By default in Windows Server 2019 remote desktop is disabled. This post will cover how to turn on and enable Remote Desktop Protocol (RDP) in Windows Server 2019, using either PowerShell or the GUI.
Note: In Windows Server 2019 Essentials edition, remote desktop is already enabled by default so you will not need to manually do this.
Remote desktop can be enabled through the graphical user interface (GUI) with the following easy steps.
Allowing Remote Desktop With The GUI
- Open Server Manager. This can be found by opening the start menu, as shown below.
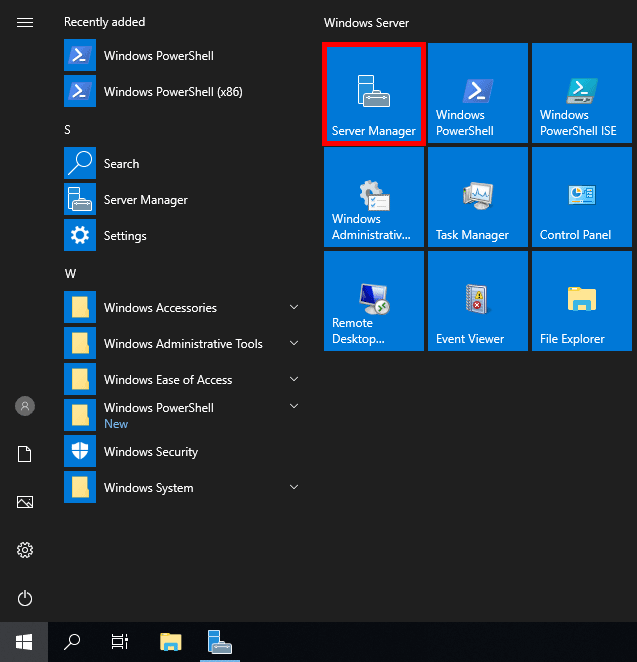
If Server Manager does not show here, simply type “Server Manager” into the start menu to search for it. By default Server Manager will open when you log in to the GUI, otherwise you can select it from the task bar.
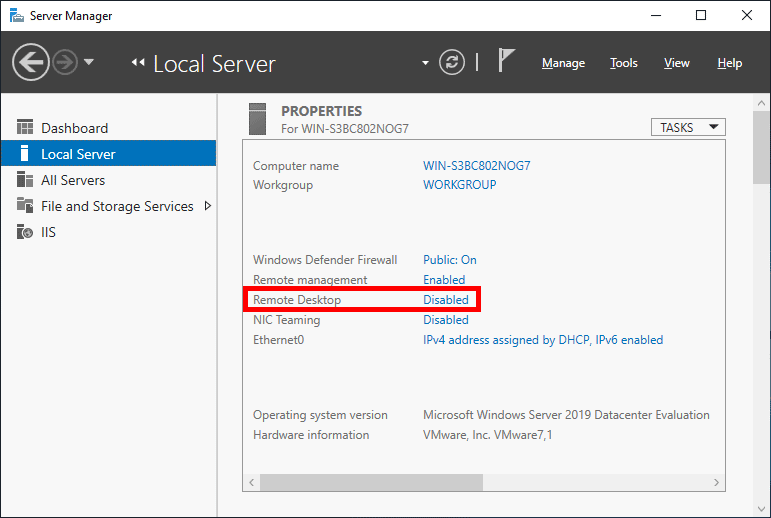
- Within the Server Manager window, select Local Server from the left hand side. You may need to wait a little for it to detect the current state of your system. You should see that Remote Desktop is listed as Disabled as shown below.
- Click on the Disabled text which will open the System Properties window in the Remote tab.
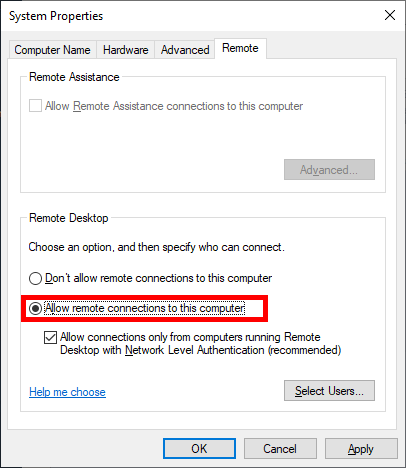
- From the System Properties window, select “Allow remote connections to this Computer” as shown below.
Tip: You can also open the System Properties window shown above by entering “SystemPropertiesRemote” into a Command Prompt or PowerShell terminal.
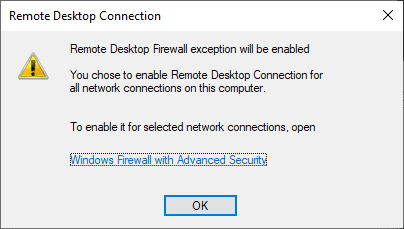
- Once you select “Allow remote connections to this computer” the below warning message will appear, advising that this will create the required firewall rules in Windows firewall to allow remote desktop traffic in from any source address, select OK to proceed.
- At this point you can optionally click the “Select Users…” button to define specific users or groups that have permission to connect via remote desktop. Select the OK button to close out of the System Properties window and enable remote desktop.
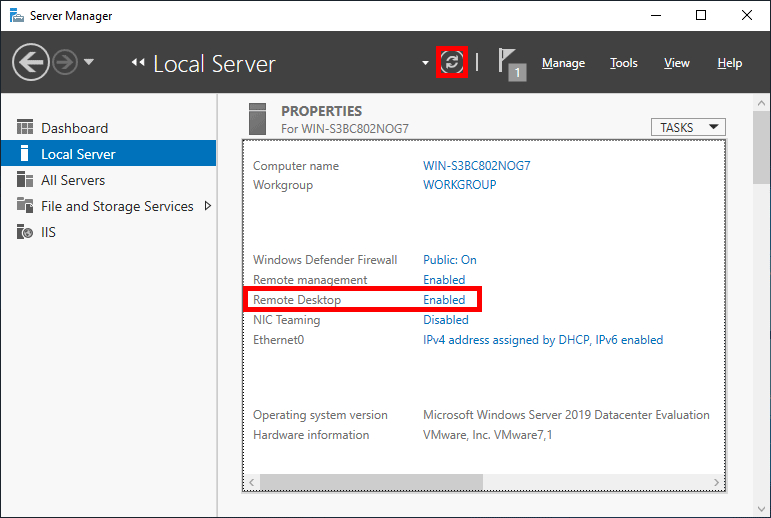
- Back in Server Manager, Remote Desktop may still show as Disabled until you refresh the view. After clicking the refresh button as highlighted below (or pressing F5 on the keyboard), the status should update to Enabled.
That’s it, remote desktop should now be ready to use!
Allowing Remote Desktop With PowerShell
While there isn’t currently an explicit PowerShell cmdlet used for enabling remote desktop, we can use the Set-ItemPropery cmdlet to modify the registry value that enables or disables Remote Desktop:
Set-ItemProperty -Path 'HKLM:\System\CurrentControlSet\Control\Terminal Server' -name "fDenyTSConnections" -value 0
Once complete we can use the ‘Enable-NetFirewallRule’ to configure Windows Firewall to allow remote desktop connections in:
Enable-NetFirewallRule -DisplayGroup "Remote Desktop"
Remote Desktop should now be accessible in Windows Server 2019.
By default this will allow all connections in, the same as if we had just enabled it using the GUI steps shown above. It is highly recommended that you configure more specific firewall rules where possible to only allow inbound traffic from known hosts.
Summary
By default Windows Server 2019 sets external remote desktop access to disabled as a security measure, we can easily optionally enable it from within the server console or via PowerShell to allow everyone or a specific set of users or groups.
Very good article. Steps regarding how to enable Windows remote desktop in Windows Server 2019 are cleared.
Is there a cost to enable remote desktop on about 100 desktops to log on to two servers with windows 2019 installed. I am told it costs about $140.00 per connection.Is this correct and if it that is true is there a no cost alternative.
Thanks
Pete Sr
Hello,
Yesterday in my Uncle office one of Computer Engineer Install Windows Server 2019 but he has not installed Any Server Version previously in any System after Installing, he is Not Able to Enable Remote Desktop Connection. than Just I Search on Google How To Enable Remote Desktop In Windows Server 2019. I got Your Post, this Post is Really helpful for me as well as Computer Engineer.
Good Work, Please Carry on.
what to do/troubleshoot if none of the above steps worked? :(