This post will cover how to increase the disk space for a VMware virtual machine running Windows Server 2008. Firstly we will be increasing the size of the actual disk on the virtual machine, so at the hardware level – the VM’s .vmdk file. Once this is complete we will get into the virtual machine and make the necessary changes through the operating system GUI in order to take advantage of the additional space that has been provided by the hard disk being extended. The server can stay online while disk space is upgraded with this method which is ideal for most production servers – no rebooting is needed!
Increasing the virtual hard disk
First off we increase the allocated disk space on the virtual machine itself. This is done by right clicking the virtual machine in vSphere, selecting edit settings, and then selecting the hard disk. In the below image I have changed the previously set hard disk of 20gb to 30gb. Once complete click OK, this is all that needs to be done in VMware for this process.
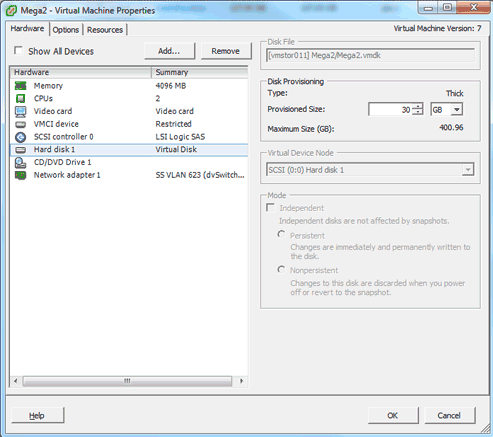
If you are not able to modify the size of the disk the provisioned size setting is greyed out. This can happen if the virtual machine has a snapshot in place, these will need to be removed prior to making the changes to the disk. Alternatively you may need to shut down the virtual machine if it does not allow you to add or increase disks on the fly, if this is the case make the change then power it back on.
Also note that this is not hypervisor specific, you can just as easily perform the disk increase through Hyper-V and then carry on through the OS with the rest of the steps below.
Expand the volume
Once the disk space increase at the underlying hardware level is complete as in the previous step, you are now ready to expand the volume through the Windows GUI. This process is extremely simple and only requires a few mouse clicks in most instances.
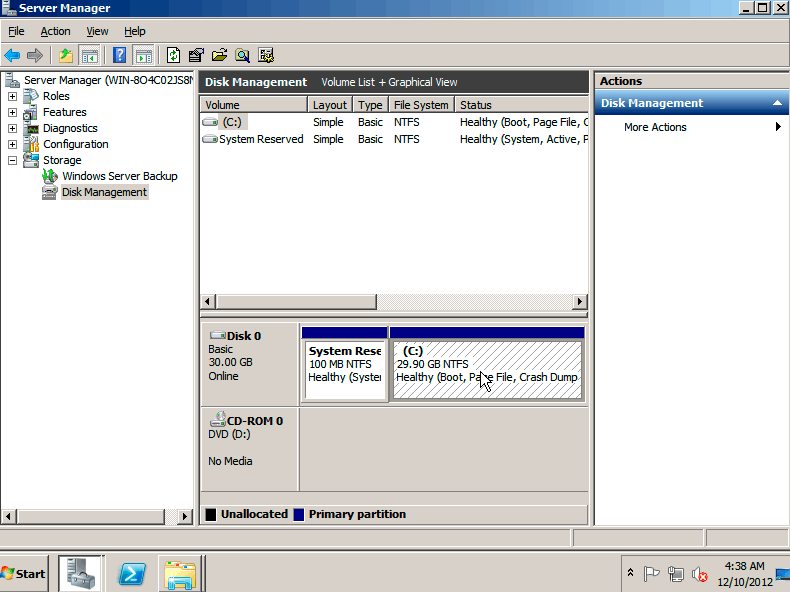
First we bring up the Server Manager and then go to Disk Management which is found under Storage, as in the below image this shows us some information on the disks.
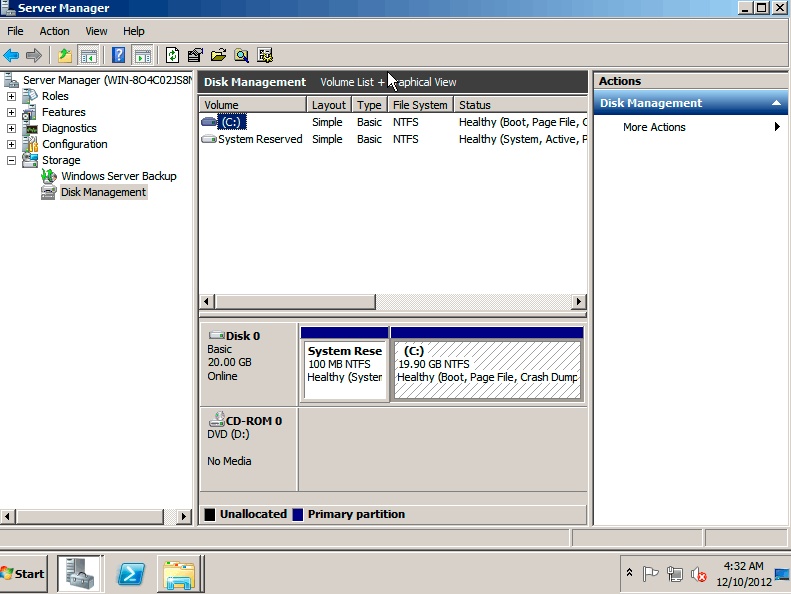
The above image is showing incorrect information as I increased the disk space on the virtual machine while it was up and running. To get the most up to date information I pressed the F5 key on the keyboard to refresh the information, alternatively you can perform this same operation by clicking Action up the top of server manager, and then refresh. This will now show you that the disk total is 30gb with 10gb of the space which we just added is currently unallocated.
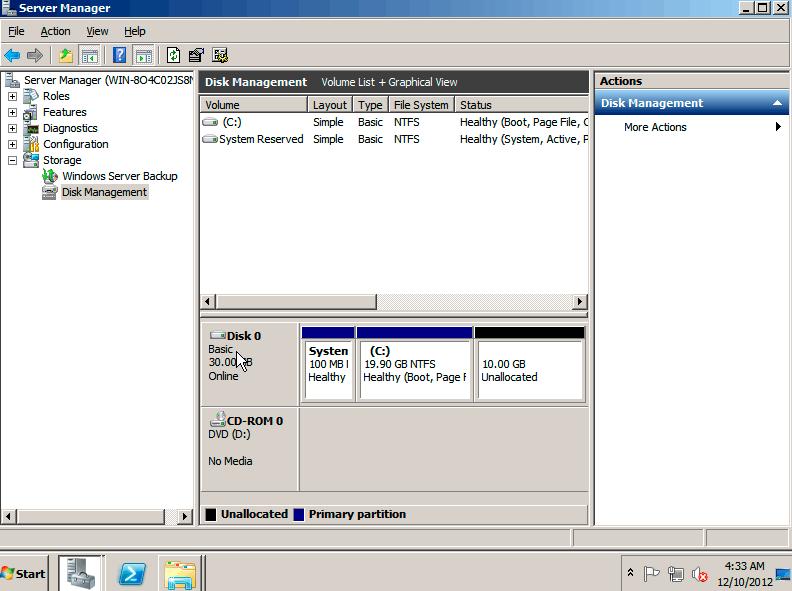
You then right click on the C: partition of 19.90GB in this example and select “Extend Volume…” and then work through the extend volume wizard.
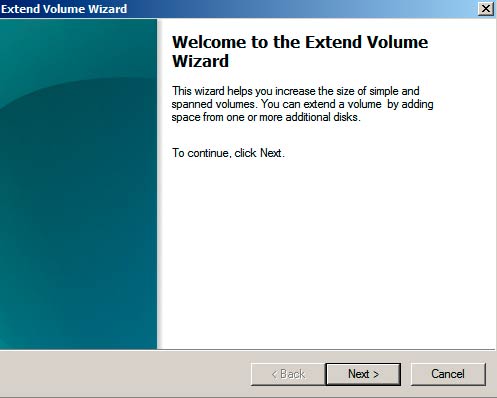
Click Next at the welcome page.
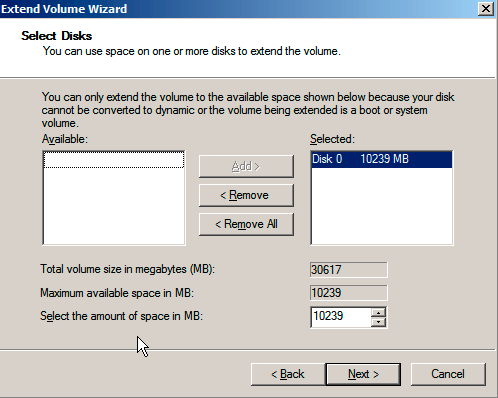
Here we can select other disks to use to increase the C: volume with, however in this instance we are using the same disk – just making use of the 10gb that is currently unallocated. By default the maximum available space of 10gb is displayed, and the total volume size of 30gb is also shown. Nothing needs to be done here, so click next.
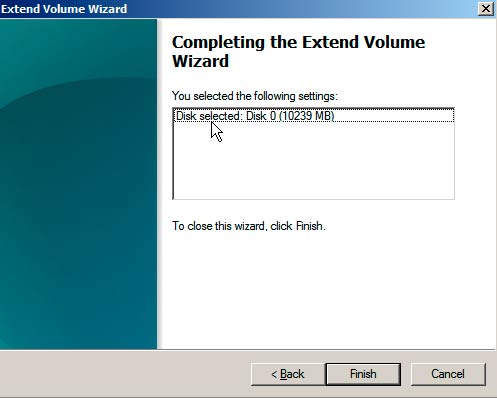
That’s it, just click finish to apply the 10gb of unallocated space to the primary disk. Now through disk management we can see that our disk has increased from 20gb to 30gb, and that the C: volume has increased by 10gb which can now be used by the operating system.
Summary
This method of increasing disk space in Windows Server 2008 is extremely useful for virtual machines, as there is no down time because the operating system does not need a reboot. Once the virtual disk has been increased, using the extend volume wizard to finish off the process is quick and easy.
Fantastic – well written, to the point and concise. Most importantly, it actually worked really well without the need for rebooting etc during a busy production environment. thanks again. JO :razz:
Awesome .. that is exactly what I was looking for, right down to the steps to first increase in vSphere
Scott :grin:
Nice one, It really helps me to execute, The steps are well described also, It is very easy to understand and to implement and to follow on.