With the correct packages we can quickly setup a simple CentOS 7 server to run a full LAMP stack.
This will turn our Linux system into a web server capable of serving out dynamic content from a database back end.
While LAMP traditionally stands for Linux, Apache, MySQL and PHP, we will be using MariaDB instead of MySQL here as MariaDB is the default in CentOS 7. Don’t worry as it’s a drop in replacement for MySQL so it’s essentially the same from a management perspective.
Install LAMP Packages
As we already have CentOS 7 installed and ready to go, we will proceed by using yum to install the Apache, MariaDB and PHP packages as shown below.
[root@centos7 ~]# yum install httpd php php-mysql mariadb-server -y
Start And Enable Services
By default both the Apache web server and MariaDB database will not be enabled to start on system boot as confirmed below.
[root@centos7 ~]# systemctl is-enabled httpd mariadb
disabled
disabled
We can enable these services so that they start up automatically on system boot as shown below.
[root@centos7 ~]# systemctl enable httpd mariadb
Created symlink from /etc/systemd/system/multi-user.target.wants/httpd.service to /usr/lib/systemd/system/httpd.service.
Created symlink from /etc/systemd/system/multi-user.target.wants/mariadb.service to /usr/lib/systemd/system/mariadb.service.

[root@centos7 ~]# systemctl is-enabled httpd mariadb
enabled
enabled
Although our services are now enabled to start automatically on boot, they are not currently running.
[root@centos7 ~]# systemctl is-active httpd mariadb
inactive
inactive
We’ll now proceed to start both Apache and MariaDB, confirming that they are actively running afterwards.
[root@centos7 ~]# systemctl start httpd mariadb
[root@centos7 ~]# systemctl is-active httpd mariadb
active
active
Configure Firewall
By default firewalld is running and enabled in CentOS 7, so external HTTP requests to our web server will be blocked automatically. We will therefore modify firewalld so that it accepts inbound traffic on port 80 for HTTP requests.
First we add the HTTP service as a permanent rule so that it persists over system reboot, then we reload firewalld so that the change is active in the running configuration.
[root@centos7 ~]# firewall-cmd --permanent --add-service=http
success
[root@centos7 ~]# firewall-cmd --reload
success
Now if we list the services that are accepted through the firewall, we will see http listed along with ssh and dhcpv6-client which are allowed through by default.
[root@centos7 ~]# firewall-cmd --list-services
dhcpv6-client http ssh
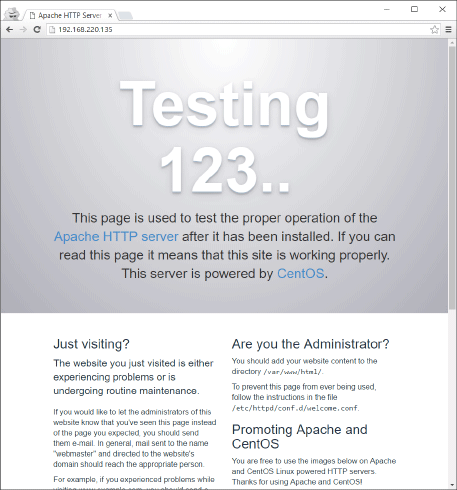
We can test by putting the IP address of the server into a web browser, we should see a default Apache test page if Apache was able to respond to the request correctly.
If you’re unsure of what your IP address is, you can run the ‘ip’ command.
Create Custom Page
For testing purposes we will create an index.html page in the /var/www/html directory, this should then be loaded rather than the default Apache page that we saw earlier.
[root@centos7 ~]# echo "Hello World" > /var/www/html/index.html

Great, so Apache is serving our static content, now let’s check that PHP is working properly and is able to serve out dynamic content.
We will do this by creating a phpinfo file, this simply outputs all sorts of information about PHP to the page.
[root@centos7 ~]# echo "<?php phpinfo(); ?>" > /var/www/html/index.php
Now if we load the IP address followed by index.php we should see the PHP information page.
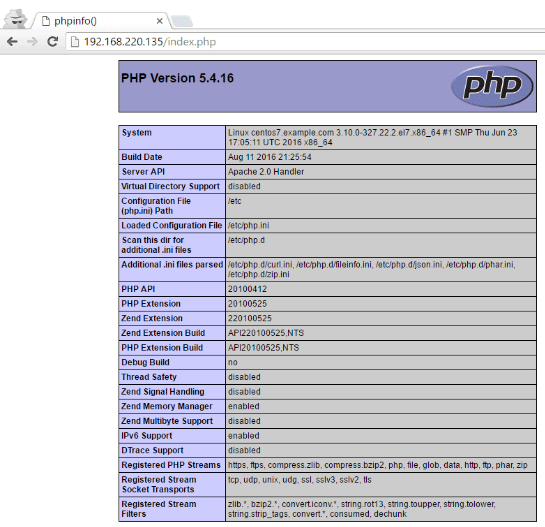
This confirms that Apache is able to serve dynamic PHP content.
Configure Database
Finally we’ll create a simple database with some example content to display on our page.
To quickly configure MariaDB, run ‘mysql_secure_installation’ and work through the steps. For my installation I responded with yes to everything, this will set the root password for the database. See our installation guide for further information on setting up MariaDB.
Once complete we will log into MariaDB as shown below. This will prompt us for the root password which we have just set.
[root@centos7 ~]# mysql -u root -p
Enter password:
Welcome to the MariaDB monitor.  Commands end with ; or \g.
Your MariaDB connection id is 11
Server version: 5.5.50-MariaDB MariaDB Server

Copyright (c) 2000, 2016, Oracle, MariaDB Corporation Ab and others.

Type 'help;' or '\h' for help. Type '\c' to clear the current input statement.

MariaDB [(none)]>
Now that we’re at the MariaDB prompt we can create our database. Once the database has been created we specify that we want to use it.
MariaDB [(none)]> create database testing;
Query OK, 1 row affected (0.00 sec)

MariaDB [(none)]> use testing;
Database changed
Next we’ll create a table and insert some data into it.
MariaDB [testing]> create table user(firstname VARCHAR(40), lastname VARCHAR(40));
Query OK, 0 rows affected (0.00 sec)

MariaDB [testing]> insert into user (firstname, lastname) values ('john', 'smith');
Query OK, 1 row affected (0.00 sec)

MariaDB [testing]> select * from user;
+-----------+----------+
| firstname | lastname |
+-----------+----------+
| john      | smith    |
+-----------+----------+
1 row in set (0.00 sec)
Rather than using our root account we’ll create a new ‘demo’ account which only has select permissions on the user table in the testing database and nothing else, as this is all that should be required to read the data. Using the root account for this simple purpose is not considered a good security practice.
MariaDB [testing]> create user demo@localhost identified by 'password';
Query OK, 0 rows affected (0.00 sec)

MariaDB [testing]> grant select on testing.user to demo@localhost;
Query OK, 0 rows affected (0.00 sec)

MariaDB [testing]> flush privileges;
Query OK, 0 rows affected (0.00 sec)
Now let’s print this information out to a web page with the help of PHP, this is why we installed the php-mysql package at the start, it is used so that we can access MySQL/MariaDB databases through PHP.
The example we’re using here is based on this example from w3schools.com.
Essentially this PHP script will load the contents of firstname and lastname from the user table in the testing database, printing them out to the page.
[root@centos7 ~]# cat /var/www/html/users.php
 <?php
$servername = "localhost";
$username = "demo";
$password = "password";
$dbname = "testing";

// Create connection
$conn = new mysqli($servername, $username, $password, $dbname);
// Check connection
if ($conn->connect_error) {
    die("Connection failed: " . $conn->connect_error);
}

$sql = "SELECT firstname, lastname FROM user";
$result = $conn->query($sql);

if ($result->num_rows > 0) {
    // output data of each row
    while($row = $result->fetch_assoc()) {
        echo "Name: " . $row["firstname"]. " " . $row["lastname"]. "<br>";
    }
} else {
    echo "0 results";
}
$conn->close();
?>
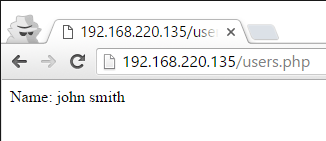
And with that final example we have now created content that uses a PHP script to read data from a MariaDB database which is then served out over HTTP via Apache.
Summary
We have shown you how to install Apache, MariaDB and PHP, allowing you to turn your CentOS 7 Linux installation into a fully fledged LAMP stack web server.
Awesome tutorial . The best I’ve seem.
Cheers! Good to hear it helped :)
Great tutorial with thorough explanation. Thank you!