Here we’re going to cover how to migrate an existing running instance of Tenable SecurityCenter from one Linux server to another.
I was not able to find great documentation around this process, and after contacting Tenable support for instructions I found that the steps provided were very basic and did not actually include everything needed, so I have documented everything that I needed to do here.
The steps provided essentially involved stopping the SecurityCenter service, confirming that it is no longer running, creating an archive of the /opt/sc directory and then exporting it to the new server.
In this particular instance, both of our old and new servers are running CentOS 7 Linux, so we will be working with the RPM packages provided by Tenable for Enterprise Linux 7.
Prerequisites And Considerations
First let’s begin with sharing some important information that you should be aware of for this migration.
Are you currently logging into the SecurityCenter web interface with local accounts? Or are they managed by some external directory such as LDAP? If you are migrating an instance of SecurityCenter that uses LDAP based accounts, you will want to ensure that you have access to a local account with administrative privileges before starting the migration so that you will be able to log in after the migration if the directory server is not available or there is otherwise some connectivity problem.
Of course if your LDAP server is still available and accessible by the new server, this may not be required, but is recommended for troubleshooting in case there are any problems with connecting to the directory server, as this will prevent you from logging in with your LDAP based accounts. If you’re moving your SecurityCenter server to a completely new environment with a new LDAP server then you definitely want to ensure you have a local administrative account before proceeding.
It’s also important to consider licensing before migrating. Tenable provide a downloadable license file through their website, and it is based on the hostname of your SecurityCenter server. If you are migrating to a new server that has the same hostname, then you should be able to simply download your existing license file and apply it if required, however it will likely just work after the migration if you copy everything as is.
If you are migrating to a server that has a new hostname, then you will need to request a new license through the Tenable website which can take up to 24 hours to process. I found that without the license, I was not able to edit settings such as LDAP on the new instance which essentially prevented me from completing the migration until I had the new license ready to go. After my license was updated, my existing instance of SecurityCenter was still running fine, allowing me to complete the migration. It is important to note that the old license should be removed from the old server once you have moved the license to the new server, as per Tenable’s terms.
The total amount of time for the migration greatly depends on the size of your current /opt/sc directory, as the majority of the time is taken by creating the compressed tar archive of this directory, copying it, and then exporting it. For an average sized installation I’d estimate that you will need around an hour to complete the entire process.
Prepare Client Connectivity
Typically SecurityCenter will connect in to various services, such as Nessus scanners. As we are migrating SecurityCenter to a new server, it may also have a new IP address depending on the specifics of your migration. This is important to keep in mind, as for example the servers running your Nessus scanners may be configured to only allow the IP address of the old SecurityCenter server in through the firewall on TCP 8834. Before migrating, you should ensure that the new server is able to connect to all clients required, and if not that connectivity should be fixed prior to performing the migration.
In the below example, we perform a simple test to confirm that we can connect to TCP 8834 on one of our Nessus scanners at 10.10.10.10.
[root@newserver ~]# telnet 10.10.10.10 8834
Trying 10.10.10.10...
Connected to 10.10.10.10.
Escape character is '^]'.
If this connection timed out, you would want to investigate the path between SecurityCenter and the client. Any host based firewall on the client such as iptables, firewalld, or Windows firewall would be a good place to start.
Any certificate/key pairs or passwords stored in SecurityCenter to connect to a client should not need to change and will be copied during the migration process.
Connectivity To Other Services
Other things to think about in terms of connectivity are how SecurityCenter connects to services such as the Internet for plugin updates, for example is this a direct connection or via a proxy? Other services include LDAP servers, syslog servers, and mail relay servers.
In your existing SecurityCenter installation you will likely have some of these services configured, such as a mail server so that you can send out reports via email. It is therefore worth confirming that you can still connect to these services from your new server, or otherwise remember to update the configuration through the web interface post migration if your new server should make use of different servers.
You can check what SecurityCenter is using through the administrative web interface by selecting System > Configuration. From here you can check what you have configured for the LDAP, mail, syslog and web proxy servers which will allow you to perform the appropriate testing from the new server.
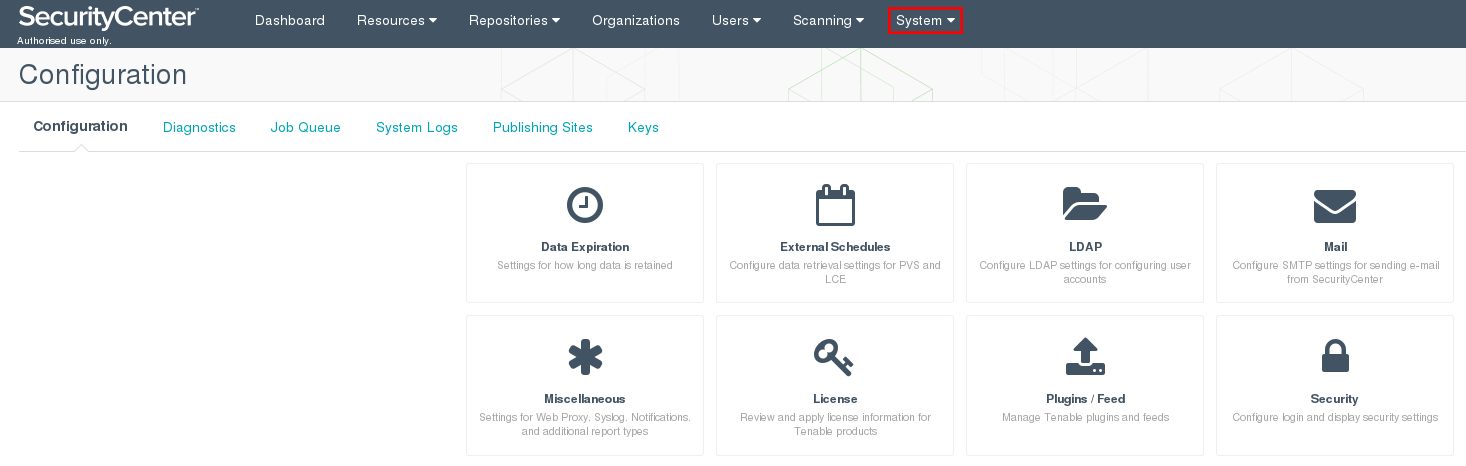
SecurityCenter System Configuration – Click To Enlarge.
Prepare The New Server
Install the SecurityCenter package
First off we need to install the same version of SecurityCenter on the new server that we have running on the old server.
If you are unsure about the version that is currently installed, use the yum or rpm command to check what you are currently using.
[root@oldserver ~]# yum list installed | grep SecurityCenter
SecurityCenter.x86_64                  5.3.2-es7                       @/SecurityCenter-5.3.2-es7.x86_64
As you can see here, our original server is running SecurityCenter 5.3.2, so this is the version that I would install on the new server as well. The RPM can be downloaded after you log in through the Tenable website.
Once you have the RPM downloaded from the website and placed onto your new SecurityCenter server, install it. You can install this with the ‘rpm -i <packagename>.rpm’ command, however personally I prefer using yum, as demonstrated below.
yum install SecurityCenter-5.3.2-es7.x86_64.rpm
Don’t remove this RPM file yet, we’ll use it again later!
Once installed, confirm that SecurityCenter will start up on boot.
[root@newserver ~]# systemctl is-enabled SecurityCenter
SecurityCenter.service is not a native service, redirecting to /sbin/chkconfig.
Executing /sbin/chkconfig SecurityCenter --level=5
enabled
If this is not enabled, run ‘systemctl enable SecurityCenter’ to ensure that the service starts automatically during boot.
Confirm disk space requirements
Ensure that you have enough free disk space on the new server in the /opt/sc directory to hold the data within /opt/sc on the old server. On my virtual machine I have added a new large disk and mounted this to the /opt directory so that I have plenty of space for SecurityCenter to grow into.
You can check how much disk space /opt/sc is currently using on your old server by running the below command.
du -h --max-depth=1 /opt/sc
Check firewall configuration
The administrative web interface of my instance of SecurityCenter is listening on TCP 443 which should be the default, so the firewall should be modified to allow traffic in from any destination ranges that you wish to access from. Below is an example of how to allow everything in for HTTPS with firewalld which is used by default in CentOS 7, if you are using something else like iptables instead you’ll need an equivalent command.
firewall-cmd --permanent --add-service=https
firewall-cmd --reload
For further details regarding working with firewalld, see my post on firewalld rich rules which will allow you to be more specific with source and destination IP addresses which is more secure than simply allowing all traffic in.
Performing The Migration
Starting with the old server
Now that we have prepared both our original instance of SecurityCenter and the clients that it connects to for migration, it’s time to get started.
We begin on the original server that we are migrating away from by stopping the SecurityCenter service so that the data is in a nice and consistent state for us to copy.
systemctl stop SecurityCenter
At this point, Tenable did advise to run the below command to check for any processes that may still be running under the ‘tns’ user account such as SecurityCenter.
ps -fu tns
If you have any output from this command, you can attempt to stop SecurityCenter again however you may need to kill the remaining processes which can be done with the below commands suggested by Tenable.
killall -u tns
killall httpd
When you have no further processes running under the tns user we can proceed by creating a compressed tar archive of the /opt/sc directory, as shown below.
tar Pczvf /root/security-center-backup.tar.gz /opt/sc
This command may take some time to complete depending on the size of your /opt/sc directory. It will create the /root/security-center-backup.tar.gz file which contains all data in the /opt/sc directory.
Move this /root/security-center-backup.tar.gz file to your new server. If your old server is able to connect to your new server this is made easy with the ‘scp’ command.
scp /root/security-center-backup.tar.gz root@newserver:/root
Once you have a copy of the original SecurityCenter installation, you should leave the service on the old server stopped. If you start it up again, things will change and you may need to export the data again if you want it to be kept up to date. To prevent the old server starting SecurityCenter up at boot you can run the below command on the old server.
systemctl disable SecurityCenter
Onto the new server!
Now that the data has been copied over to the new server, we will be working on the new server. At this point the old server should no longer be required, however don’t remove anything at this point in case anything goes wrong and you need to roll back to the old server.
Before importing the data from the old SecurityCenter server to the new one, we want to stop the service on the new server and ensure that it is not running before proceeding in the same way as before.
systemctl stop SecurityCenter
ps -fu tns
Once you have confirmed that SecurityCenter is not running on the new server, we can extract the data to the /opt/sc directory.
mkdir /root/sc-tmp
cd /root/sc-tmp
tar xf /root/security-center-backup.tar.gz
yes | cp -R * /opt/sc
rm -rf /root/sc-tmp
The ‘yes’ before the copy command is used to automatically answer yes when prompted to overwrite a file. This is used as there will be a lot of files with the same name in /opt/sc which are part of SecurityCenter and we want to overwrite all of these on the new server with the files from the old server.
At this point, Tenable recommend running the following command on the RPM file that you previously used to install SecurityCenter on the new server.
rpm -Uvh --force SecurityCenter-5.3.2-es7.x86_64.rpm
Next edit the /opt/sc/support/conf/vhost.conf file on the new server. This is a simple Apache virtual host that listens for HTTPS connections on TCP 443. In my instance the IP address of the old server was in the first VirtualHost line, so modify this to the IP address of your new SecurityCenter server.
<VirtualHost 10.0.0.10:443>
RewriteEngine on
RewriteOptions Inherit
Include conf/vhostsettings.conf
Include conf/vhostssl.conf
</VirtualHost>
As you can see in the above VirtualHost, it’s importing /opt/sc/support/conf/vhostssl.conf which specifies the certificate and key files in use as shown below.
SSLCertificateFile "/opt/sc/support/conf/SecurityCenter.crt"
SSLCertificateKeyFile "/opt/sc/support/conf/SecurityCenter.key"
SSLCACertificatePath "/opt/sc/data/CA"
These are used to provide the secure HTTPS connection when you connect to the web page. If the domain name that you will be accessing the SecurityCenter web interface has changed, you will need to create a new certificate with an updated common name, once complete place it in the location defined in the file shown above. Speaking of the domain name, be sure to update DNS to point to the new server if the IP address is changing due to the migration.
At this point we are ready to start SecurityCenter on the new server.
systemctl start SecurityCenter
Troubleshooting
If SecurityCenter does not start correctly, check for any application specific logs in the /opt/sc/support/logs directory, or perhaps even /var/log. These should provide you with further information to investigate any problems. If you’re not able to solve the problem yourself, you can simply start up SecurityCenter on the old server and roll back while you work with Tenable support to resolve the issue on the new server. Once the issue has been resolved you can simply start this process again and export the updated data from /opt/sc on the old server.
Summary
You should have now successfully migrated your existing instance of Tenable SecurityCenter from an old server to your new server. While this was fairly straight forward, it did involve a few extra steps compared to the simple guidelines that I was provided from Tenable support, which I found out by working through various problems along the way which have been addressed throughout this process.
This is helpful but for me upon extracting the backup file I had to use “tar -Ppzxf” options.
Great post, many thanks.
Having recently had to do this, I used rsync over ssh instead of tar, it was much faster, and also has the advantage of being able to rsync only the changes if you need to revert back to your old environment or if the transfer gets interrupted, you can then just sync the changes over.
rsync -avrz --stats --progress -e ssh /opt/sc/ foo@newsc:/opt/scYou can speed things up further by using parallel, pigz.