By default data transferred over the network to an SMB share is in plain text, meaning that an attacker with access to the network can view the files being transferred. By enabling SMB encryption on SMB shares this can be prevented.
When creating an SMB share either with PowerShell or through the graphical user interface (GUI) we have the option to enable SMB encryption on the share. We’ll be showing you how to enable SMB encryption on an existing SMB file share in these examples using both PowerShell and the GUI in Windows Server 2016.
This post is part of our Microsoft 70-744 Securing Windows Server 2016 exam study guide series. For more related posts and information check out our full 70-744 study guide.
Enable SMB Encryption – PowerShell
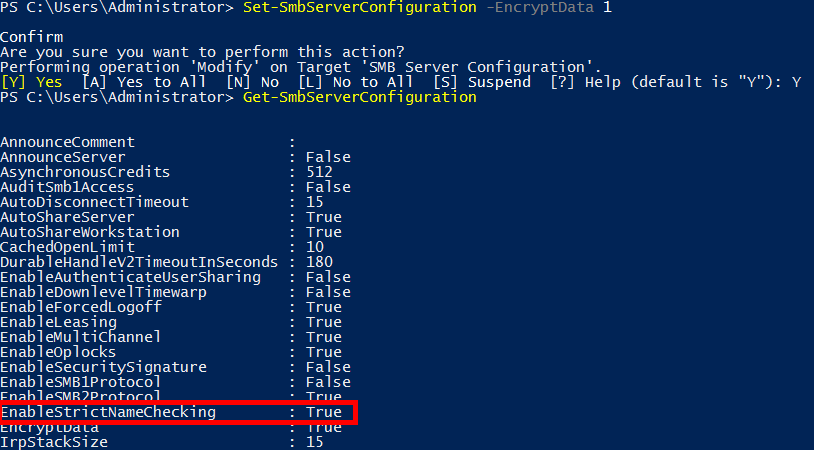
With PowerShell we can modify the global server SMB configuration to enable encryption. If we run the Get-SmbServerConfiguration cmdlet as shown below, we can see that EncryptData is set to false.

We can modify this with the Set-SmbServerConfiguration Powershell cmdlet by setting EncryptData to 1 for true. Then if we run Get-SmbServerConfiguration again, we should see that EncryptData is now set to true.
If we don’t want to enable SMB encryption server-wide, we can instead only specify a specific share that should be encrypted. This is similar to the above, but done instead with the Set-SmbShare cmdlet, followed by the name of the share as shown below.

Note that if you use PowerShell to enable encryption on a per SMB share basis in this manner and you have the GUI open at the same time (as covered below), you’ll need to refresh the GUI for it to update and correctly display that the share is indeed encrypted.
While in general it’s best practice to enable encryption globally, you may have instances where you have SMB clients that don’t have support for the encryption so these shares may not be able to use this.
Enable SMB Encryption – GUI
Through the graphical user interface we can only encrypt SMB shares on a per share basis, which is not as powerful as setting it as the default server wide as we did above with PowerShell.
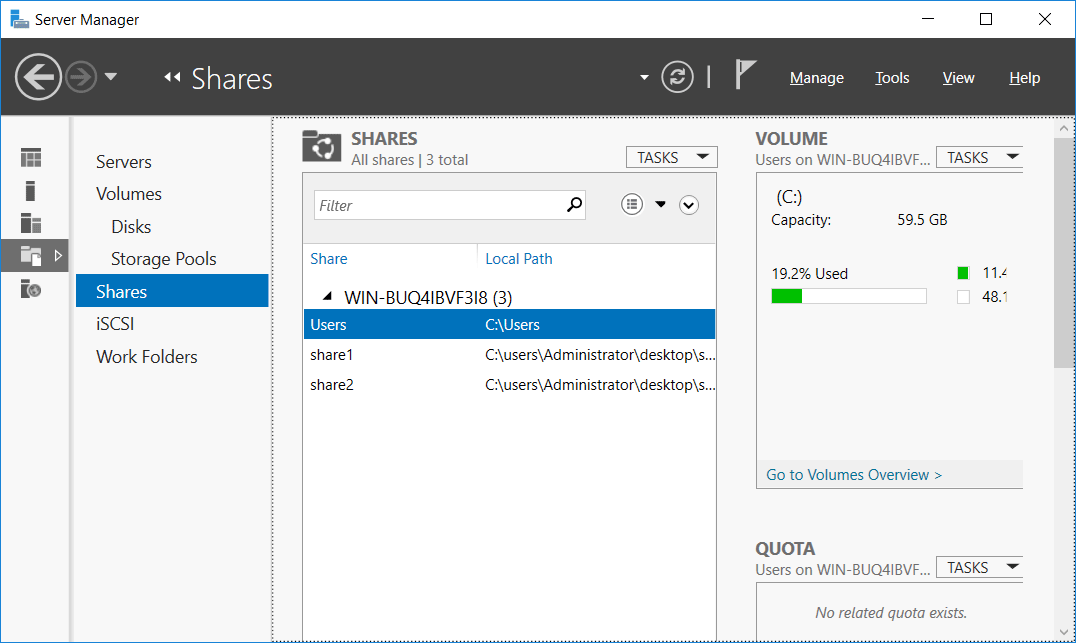
To encrypt an SMB share through the GUI, simply open Server Manager > File and Storage Services > Shares. You should now see a list of all available SMB shares on the server.
From here right click the share in question and select properties. From the left hand side select Settings, and tick the Encrypt data access checkbox, and click the OK button to apply the changes.
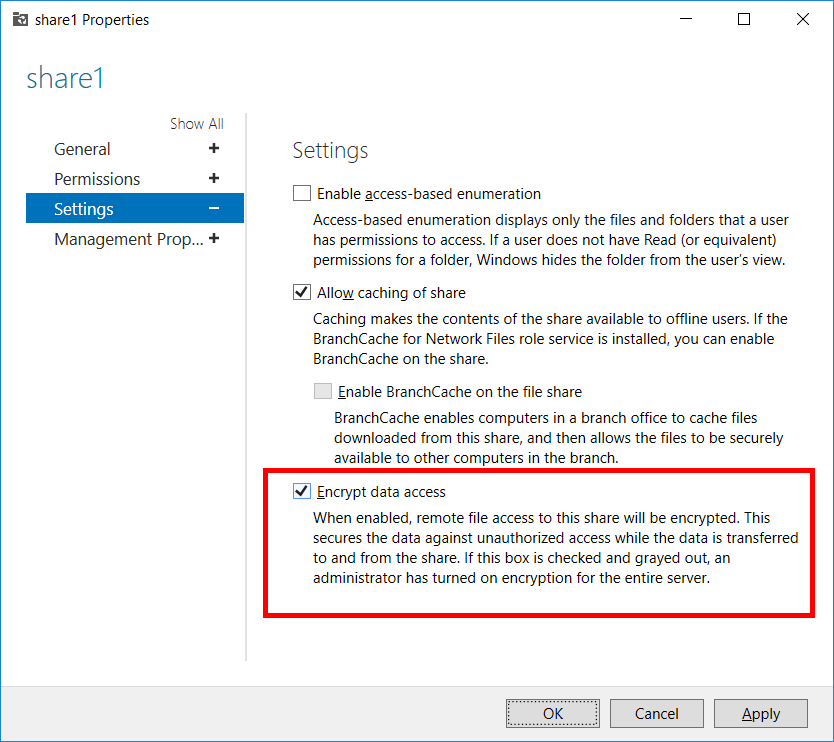
Note that if we use PowerShell to enable SMB encryption for the whole server, this option will already be ticked and greyed out, it will not be possible to change through the GUI.
That’s all there is to it, remote access to the SMB share will now be encrypted.
Summary
We can use either PowerShell or the graphical user interface to enable SMB encryption on SMB shares. The PowerShell option is more flexible as we can enable encryption on all existing and future shares at once, while both PowerShell and the GUI can be used to instead enable SMB encryption on a per share basis.
This post is part of our Microsoft 70-744 Securing Windows Server 2016 exam study guide series. For more related posts and information check out our full 70-744 study guide.
0 Comments.