In this post we will show you how to use group policy to configure computers within an Active Directory domain to perform automatic Windows updates from either the Internet or a WSUS server that you manage.
This post is part of our Microsoft 70-744 Securing Windows Server 2016 exam study guide series. For more related posts and information check out our full 70-744 study guide.
Automating updates will save you a lot of administration time and speed the patching process up in the long run. By automatically applying Windows updates you will not need to log into each machine manually and perform updates. When combined with WSUS we can also report on which servers have which updates installed, allowing us to see the patch level of the entire Windows environment.
Configure Group Policy
In this example we will create a group policy object (GPO) which applies to all of our Windows computers. We already have all of our computer objects stored within the same organizational unit (OU) called “Servers” in this example, so this is where we will apply our GPO to.
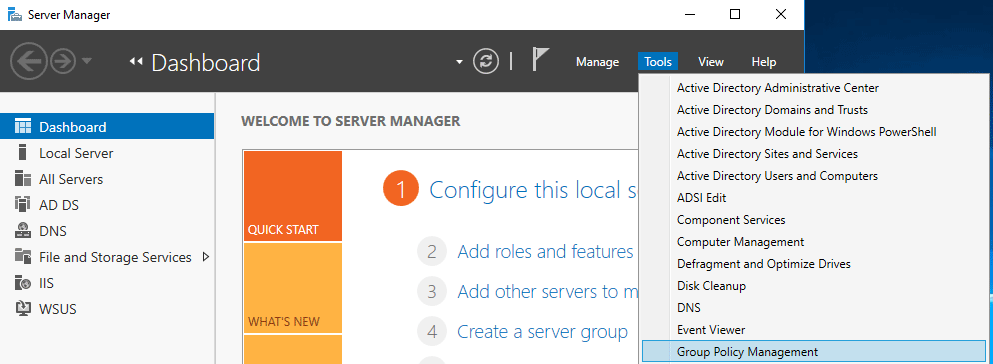
To configure group policy, open the Group Policy Management console from within the Tools menu in Server Manager as shown below.
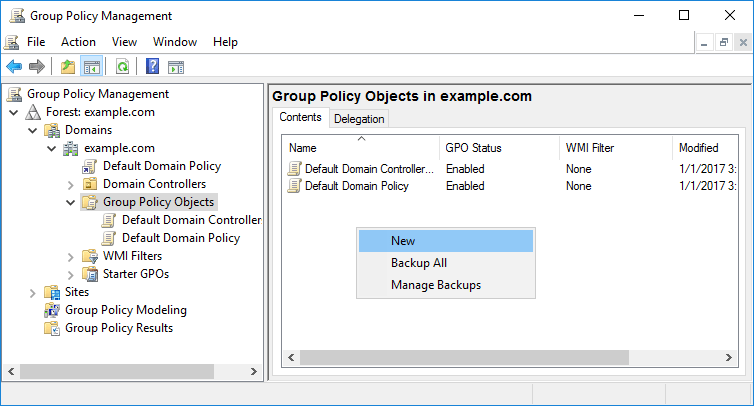
In this instance we’re going to create a new GPO to apply our changes rather than simply updating the existing Default Domain Policy as this is the best practice. Within the Group Policy Objects, right click and select New.
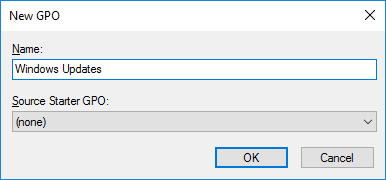
Give the GPO a sensible name so that it will be easy for others to identify in the future.
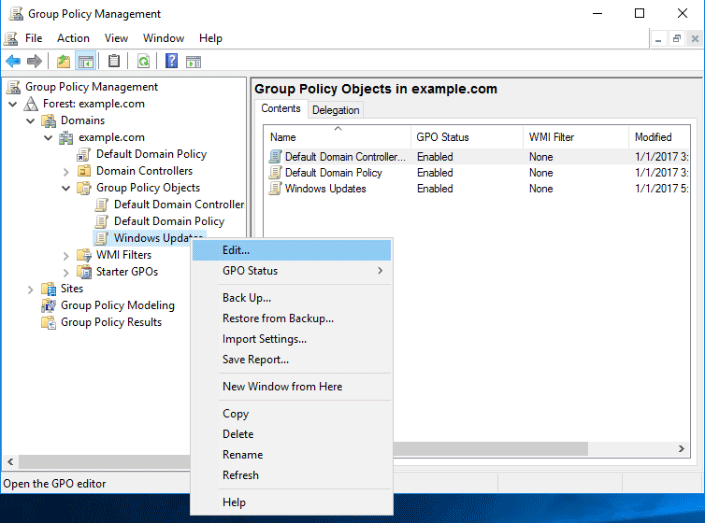
Right click your newly created GPO and select Edit.
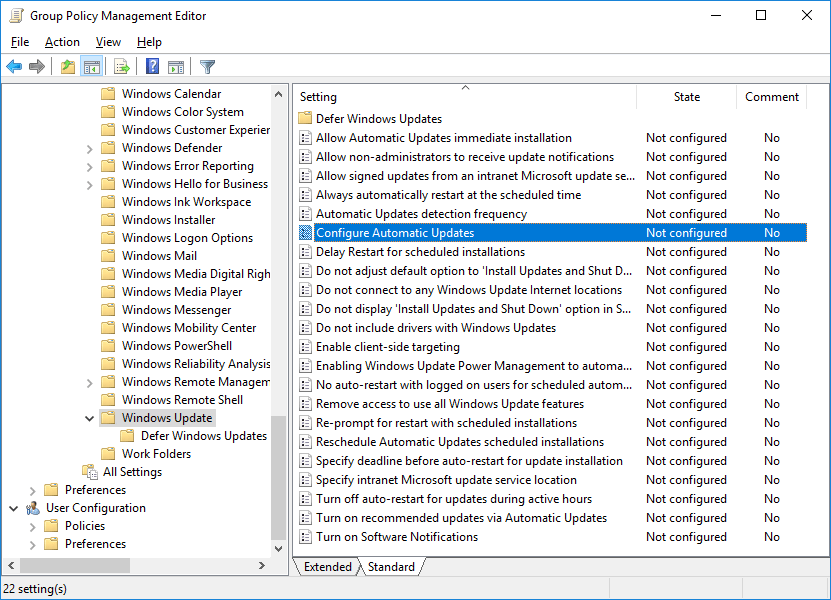
From within the Group Policy Management Editor (GPME) select Computer Configuration > Policies > Administrative Templates > Windows Components > Windows Update. From here you’ll be able to see all of the configuration options you have regarding Windows update.
Configure Automatic Windows Updates
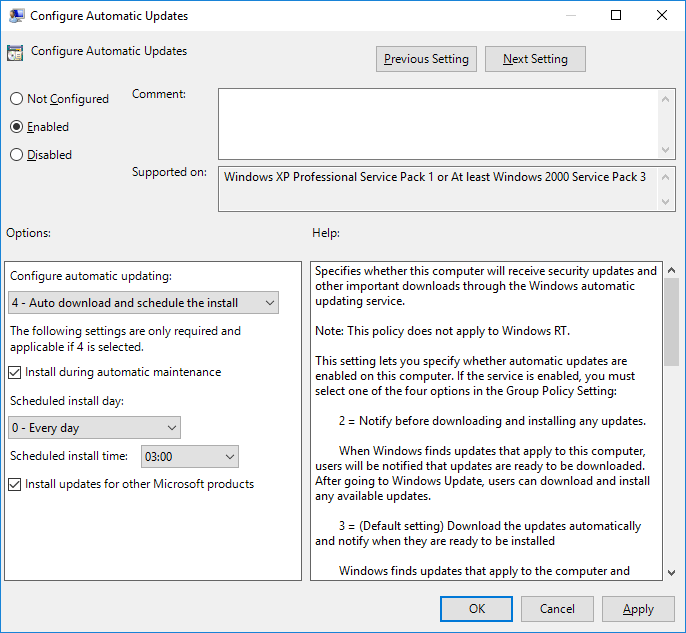
The primary policy for configuring automatic updates is, unsurprisingly, “Configure Automatic Updates” as highlighted above. Set this policy to enabled and then specify one of the four options. If this policy is left in the default Not Configured state, automatic updates are not configured and will be controlled manually on a per computer basis by the local administrator.
The following is a list of the different options you can apply when configuring automatic updates through this policy.
- 2. Notify for download and notify for install: If updates are found that need to be installed on the computer the user will be notified that there are updates ready to be downloaded and installed. This option will allow users to download and install the updates.
- 3. Auto download and notify for install: This is the default setting, and will automatically download required updates without notifying or interrupting the user. Once the downloaded updates are ready for installation the user will be notified, the user is then able to install them. Personally I prefer this option over the one above, as having the updates pre-downloaded and ready to go will speed up the installation process.
- 4. Auto download and schedule for install: This is the best option for deploying automatic Windows updates in my opinion. You specify a date and time for Windows updates to download and install, if a restart is required then the computer will also restart automatically in order to complete the update process. Any signed in user will be warned that the computer is scheduled to restart shortly.
- 5. Allow local admin to choose setting: Only local administrators will be able to use Windows update to configure the updates. This is usually the least desirable option when you’re trying to automate updates in a large environment.
If you choose number 4, you can optionally check the box to install during automatic maintenance. Automatic Maintenance installs updates when the computer is not in use and is available in Windows 8 and newer. The updates will also not happen if the computer is running on battery power. If the updates do not install within two days the updates will be installed right away.
We can then specify if we want updates to install automatically every day, or specify a specific day of the week followed by the time the updates should begin from. We can also optionally select to automatically update other Microsoft products, such as Microsoft’s Office suite for example.
There are some other useful policy options here that can also be used to customize how automatic Windows updates are performed. For example we can further tweak the automatic restarting, control how users are prompted regarding update notifications, or set the automatic update detection frequency just to name a few.
Point to WSUS Server
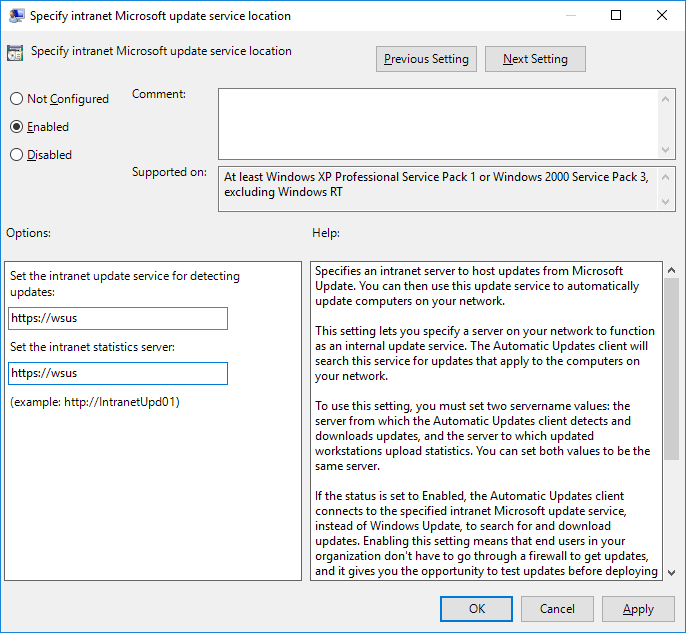
Optionally if you’re using a WSUS server you will want to set the “Specify Intranet Microsoft update service location” policy to point to the WSUS server for both updates and statistics. Simply enable the policy and specify your WSUS server as shown below.
You may also want to look at using the “Enable client-side targeting” policy to specify which computer groups in WSUS the computers should belong to, more information can be found here on computer groups.
If you’re not using a WSUS server there’s no need to enable these policies, your computers will attempt to connect out to the Internet directly by default.
Link The Policy
Once you’ve completed configuring the GPO, close the Group Policy Management Editor and return back to the Group Policy Management window. Right click the container or OU that you want to link the policy to and select “Link an Existing GPO…” as shown below.
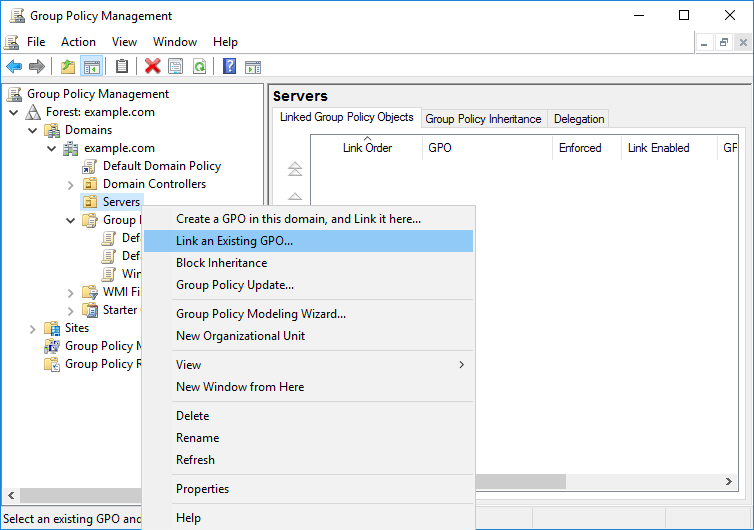
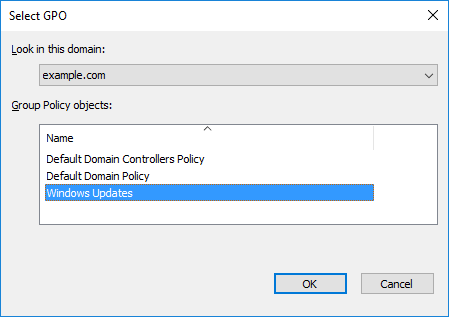
From the Select GPO window that appears next, pick the GPO that you wish to link. In this case we’re after our Windows Updates GPO which contains all of the changes that we’ve just made.
Alternatively you can also drag and group the GPO from the Group Policy Objects container straight onto the location of your choosing.
Keep in mind that it can take up to 90 minutes for the GPO to roll out to the computers within the linked OU, so you may wish to manually run the “gpupdate” command on a computer directly which will perform the group policy update straight away if you’re keen to test.
Summary
We have shown you how to use group policy to configure Windows computers to automatically download and install Windows updates. Optionally you can also set a policy to configure all servers to make use of a WSUS server, this way you can view more detailed reporting information in WSUS and easily see which servers have received a set of updates.
With automatic updates in place we can now sit back and relax, and by that I mean spend the time fixing some other problem instead.
This post is part of our Microsoft 70-744 Securing Windows Server 2016 exam study guide series. For more related posts and information check out our full 70-744 study guide.
0 Comments.