By default Apache will serve web content out over the wire in the clear via HTTP which is insecure. We can increase the security between clients and the web server by using HTTPS. This will encrypt the data transferred between the two and is done by configuring TLS.
Here we will add HTTPS support for our test domain www.example.com, which we previously configured in our virtual host configuration guide.
As SSLv2 and SSLv3 are now considered insecure we will not be configuring SSL here and only use TLS.

Studying for your RHCE certification? Checkout our RHCE video course over at Udemy which is 20% off when you use the code ROOTUSER.
Firewall Configuration
In order to allow HTTPS traffic in through the firewall run the below commands.
[root@centos ~]# firewall-cmd --permanent --add-service=https
success
[root@centos ~]# firewall-cmd --reload
success
Generate the Key Pair
HTTPS works by using X.509 certificates which we must first generate. In this example we will be generating a self signed certificate, that is the server itself that is creating the key is creating the public key. Normally for a production website that will be accessible over the Internet you will provide a certificate signing request (CSR) to a trusted certificate authority (CA) such as GeoTrust who will sign the certificate, a process that usually costs money and is not required for testing.
To create our certificates we are going to use the genkey command which is part of the crypto-utils package. Although there are other methods of creating the certificates such as with OpenSSL, genkey walks you through a text user interface (TUI) for the whole process so you don’t need to remember various trivial command flags. Simply enter the genkey command followed by your domain name (common name) that the certificate is to cover. In this case we are creating a certificate for www.example.com as we want to access https://www.example.com securely over HTTPS.
[root@centos ~]# genkey www.example.com
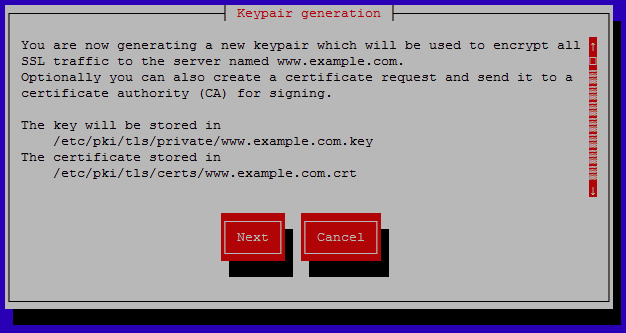
At this point the text user interface will appear walking you through the process. The first screen advises where the certificate and key files will be stored once the keypair has been created, select next to continue.
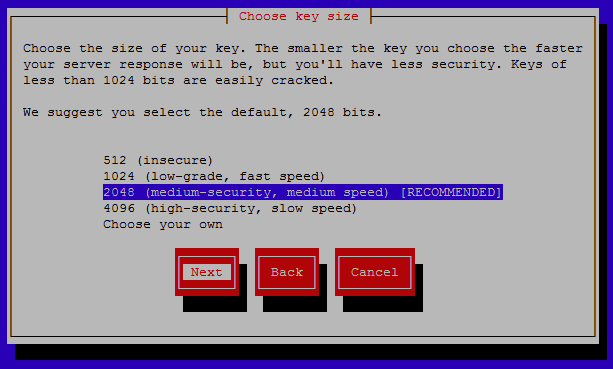
You will now be prompted to select the size of your key, the smaller the key the faster the response time will be however it will be less secure. A key size of 2048 bits is recommended as this provides a fair trade off between speed and security. Select next to continue after highlighting the key size to use.
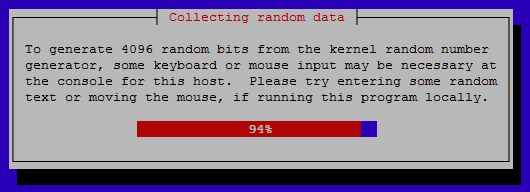
Wait while the random bits are generated.

Random data will be used to generate the key, you can enter random keys and move the mouse in the console to speed up this process.
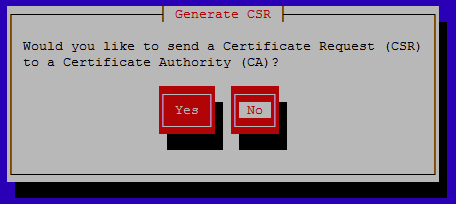
You can optionally select to generate a CSR if you will be signing the certificate with a CA, in this case we are creating a local self signed certificate so we will select no here.
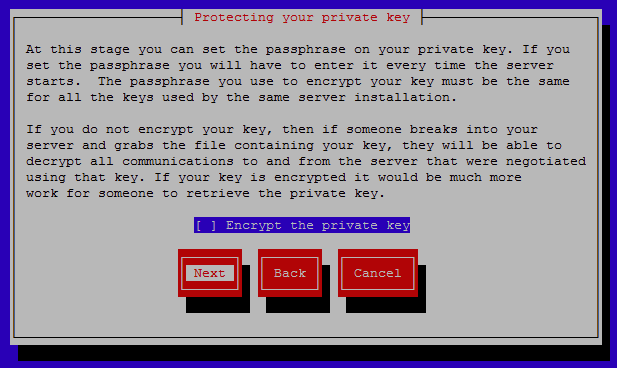
You can optionally set a passphrase on the private key which will encrypt it and keep it secure from theft, this is recommended in a production environment so that the key can not be easily stolen. For our purposes of testing we will not encrypt the key.
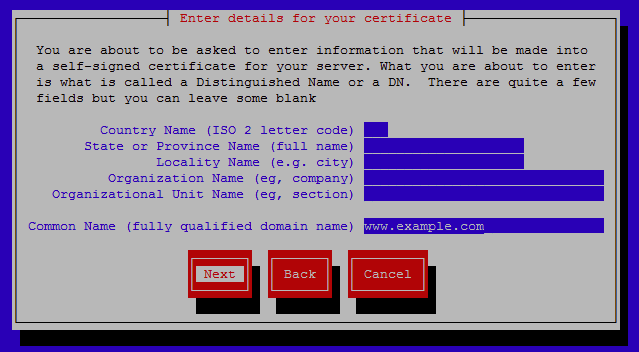
Enter details for the certificate, these will display to users connecting to the website. It is important that the common name (FQDN) be set to the domain that the certificate will cover, in this case we are using www.example.com and this was already filled in as we specified this common name with the initial genkey command.
After this process has been completed, you will see the actual command that was run based on your selections within genkey, it should also list where your certificate and key can be found.
output will be written to /etc/pki/tls/certs/www.example.com.crt
output key written to /etc/pki/tls/private/www.example.com.key
By default certificates will be stored in the /etc/pki/tls/certs/ directory and keys in the /etc/pki/tls/private/ directory, you can optionally move these files elsewhere however we will leave them in place for now.
Although genkey is quite user friendly and easy to remember, the key does take some time to generate which may not be ideal if you are in an exam situation, instead of genkey you can create the certificate and key much faster with OpenSSL, the command for this is shown below.
openssl req -x509 -nodes -days 365 -newkey rsa:2048 -keyout www.exmaple.com.key -out www.example.com.crt
Apache Configuration
Now that the certificate and key are ready it’s time to configure Apache. In order for Apache to be able to work with TLS we must install the mod_ssl package as shown below.
yum install mod_ssl -y
Once installed this will create the default configuration file within /etc/http/conf.d/ssl.conf, this file specifies that Apache will listen on TCP port 443 for HTTPS requests as well as other defaults such as the protocols and cipher suites to use.
Next we will be modifying our existing /etc/httpd/conf.d/example1.conf configuration file which was created in our virtual host configuration guide, be sure to check that out if you need to understand how virtual hosts work.
Below is the content of /etc/httpd/conf.d/example1.conf, noting that the VirtualHost *:80 configuration was already in place.
<VirtualHost *:80>
    DocumentRoot "/var/www/html/example1"
    ServerName www.example.com
    ServerAlias example.com
    ServerAdmin [email protected]
    ErrorLog "/var/log/httpd/error_log"
    CustomLog "/var/log/httpd/access_log" combined
</VirtualHost>

<VirtualHost *:443>
    DocumentRoot "/var/www/html/example1"
    ServerName www.example.com
    ServerAlias example.com
    ServerAdmin [email protected]
    ErrorLog "/var/log/httpd/error_log"
    CustomLog "/var/log/httpd/access_log" combined

    SSLEngine on
    SSLCertificateFile /etc/pki/tls/certs/www.example.com.crt
    SSLCertificateKeyFile /etc/pki/tls/private/www.example.com.key
</VirtualHost>
Essentially the virtual host configuration for port 80 was copy and pasted and the port was modified to 443 as this is the port HTTPS requests use by default. For a full understanding of what all of these lines in the virtual hosts actually do refer to our virtual host configuration guide.
Next we will cover the new lines that appear in the *:443 virtual host.
- SSLEngine on – This simply states that the SSL Engine is on and that this virtual host will be used to serve secure connections.
- SSLCertificateFile /etc/pki/tls/certs/www.example.com.crt – This specifies the location of the certificate to be used, this was created with genkey above.
- SSLCertificateKeyFile /etc/pki/tls/private/www.example.com.key – This specifies the location of the private key to be used, this was created with genkey above.
This is all that is really required, all of the other default configuration within the /etc/httpd/conf.d/ssl.conf file will be used for anything that is not specified within the virtual host.
If we had signed our certificate with a third party CA we would also make use of ‘SSLCertificateChainFile’ and specify the chain file provided by the CA, however as we are using a self signed certificate this will not be required.
Testing HTTPS
Prior to performing any testing we must apply any changes that have been made within the Apache configuration files by either restarting or reloading httpd.
systemctl reload httpd
Now that our configuration changes are live we will perform our test of both HTTP and HTTPS with the curl command. We will be using the -k flag when testing HTTPS as this allows curl to perform “insecure” SSL/TLS connections and transfers, the reason this is seen as insecure is because we have used a self signed certificate.
[root@centos ~]# curl http://www.example.com
example.com website
[root@centos ~]# curl -k https://www.example.com
example.com website
As the same output is correctly being served from our /var/www/html/example1/index.html page this confirms that our modified virtual host is successfully serving the website out via secure HTTPS connection.
We can optionally view the certificate information with the openssl command shown below which will connect to Apache over port 443.
openssl s_client -showcerts -connect www.example.com:443
Further Information
If you get stuck or have trouble remembering any of this, remember the httpd-manual package which can be installed and viewed at http://localhost/manual.
From the main page, simply select SSL/TLS Encryption for help on this topic.
Summary
As demonstrated we can create a certificate and key with genkey, install mod_ssl via yum, and configure a virtual host to listen on port 443 and specify our certificate and key to use. After completing all changes the httpd service was reloaded to apply the configuration changes and we then confirmed that Apache was correctly providing encrypted content over HTTPS.
This post is part of our Red Hat Certified Engineer (RHCE) exam study guide series. For more RHCE related posts and information check out our full RHCE study guide.
At least on my systems, it takes minutes for genkey to generate a keypair, when openssl takes seconds. I’d advise to use openssl on the exam, it just seems much faster.
I agree, however you have to admit it’s a lot easier to remember “genkey hostname” for the exam :)
Not really, all I need to remember is to use this template: /etc/pki/tls/certs/make-dummy-cert :)
Oh that’s useful, I was just looking for something similar like that in the OpenSSL man pages without any luck, thanks!
in some examples, I saw they use three certs and key files.
SSLCertificateFile – certificate file
SSLCertificateKeyFile – certificate key file
SSLCertificateChainFile – what exactly it is? how would you generate it? if you are using self-signed certificate?
The chain file usually comes from a third party CA, for instance if you have your own PKI set up and you are using it to sign your certificate signing request, you would use the certificate from the certificate authority (CA).