By default Apache will serve content out to anyone that requests it which essentially makes it public. We can add some additional simple configuration to create a private directory that can only be accessed based on source IP address, or with a username and password combination, or even based on user group membership.
This is handled by default via mod_authz_core which is installed with Apache by default, this module is used to configure authorization so that we can only allow authenticated users to be allowed access to certain parts of the web site.
Note: In this example we are working with Apache 2.4 in CentOS 7, some steps may vary depending on your version of Apache and specific Linux distribution.

Studying for your RHCE certification? Checkout our RHCE video course over at Udemy which is 20% off when you use the code ROOTUSER.
Creating a User Account
In our example we will be creating a user and password that can access the /secret/ directory of our website. First lets create the user that will have access, this can be done with the htpasswd command as shown below.
[root@centos7 ~]# htpasswd -c /etc/httpd/htpasswd test
New password:
Re-type new password:
Adding password for user test
Here we are using -c to create the /etc/httpd/htpasswd file which is the file that will contain our username and password for the user named ‘test’. The -c flag should only be used the first time that you are creating the file, otherwise if you use this again it will overwrite all previous contents with a new file.
Once you enter a password twice for the account the file will have been created, we can view the contents as shown below.
[root@centos7 ~]# cat /etc/httpd/htpasswd
test:$apr1$a55SSGwb$ZB2Of7y3wMzDO1NeLtfEX1
Here we can see that the user ‘test’ exists along with the encrypted password. By default this file will be readable by all users, so you may want to change that – Apache will need to be able to read it however.
Apache Configuration
Below is some example configuration that you can place into /etc/httpd/conf/httpd.conf
<Directory /var/www/html/secret>
  AuthType Basic
  AuthName "Private Content!"
  AuthUserFile /etc/httpd/htpasswd
  Require valid-user
</Directory>
After saving the changes to the file you can test that the syntax is correct with ‘apachectl configtest’. Once these modifications have been applied, Apache must be reloaded to actually apply them as shown below. We also have a guide if you need further information on managing services with systemctl.
systemctl reload httpd
Let’s explain what each configuration line here is actually doing.
- Directory: This is used to specify the directory that the following configuration applies to, here we are saying that /var/www/html/secret is the directory on the web server that should be private.
- AuthType: This selects the type of authentication to use on the directory specified.
- AuthName: This is basically the text that will display when logging in.
- AuthUserFile: This defines the location of the file containing usernames and passwords which we created previously with the ‘htpasswd’ command.
- Require: Here we are requiring a valid user to authenticate, this is any user that exists in the /etc/httpd/htpasswd file that we have created. Instead of requiring any valid user, we can instead specify specific users with “Require user test” which would only allow the test user access regardless of any other users that have been created. We can instead only allow access from a particular IP address by using “Require ip 1.2.3.4”.
Allowing access based on usernames is not very scalable, instead it is possible to specify and allow groups. This can be done by adding the following configuration to the /etc/httpd/conf/httpd.conf file.
  AuthGroupFile /etc/httpd/htgroup
  Require group groupname
- AuthGroupFile: This defines the location of the file containing the group names and users that are members of the group. The file can be edited with a text editor and should be formatted as ‘groupname: user1 user2’, so the group is specified first followed by all users that are defined in /etc/httpd/htpasswd who should belong to that particular group.
- Require: In this case require specifies the group name ‘groupname’, this replaces the previous Require user or Require valid-user line.
Here we are using a simple local file that contains the usernames and passwords of accounts that have access which is very basic, we can instead authenticate against an external service like IPA or Active Directory via LDAP/Kerberos with mod_authnz_ldap or mod_auth_kerb, both of which can be installed with ‘yum’.
Testing
You can test the configuration by browsing to the IP address of the web server (or domain if configured) and specifying the directory that you have configured for username and password authentication. In my instance my CentOS 7 virtual machine is at 192.168.1.10. Upon browsing to the /secret directory I am prompted with the message shown below.
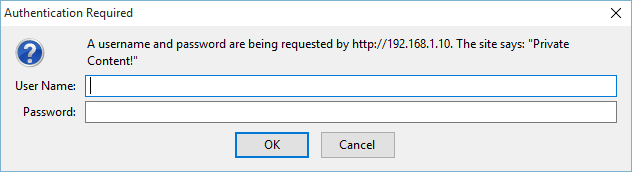
This ensures that a username and password are needed to view http://192.168.1.10/secret/, if the incorrect username and password combination are entered access will be denied.
It’s also worth noting that in this example I am accessing the page with clear text HTTP, so upon entering the username and password they will transfer to the server in the clear and be readable over the wire. This can be secured further by configuring TLS with Apache which will encrypt the username and password in transit, as well as other requests between you and the web server.
Restrict Hostnames
We can also accept or reject access based on hostname of the client viewing the page with the “Require” directive, as shown below.
Require host host1.example.com
In this case only the machine host1.example.com would be accepted. This can also be applied to an IP address or range with “Require ip x.x.x.x”.
Further Information
If you get stuck or have trouble remembering any of this, remember the httpd-manual package which can be installed and viewed at http://localhost/manual.
From the main page, simply select Authentication and Authorization or Access Control for help on this topic.
Summary
With some basic Apache configuration we have been able to enforce username and password access to specific website content. This could be expanded with Kerberos or LDAP based authentication rather than the Basic type used here which is specifying a local file that contains various usernames and passwords, a more scalable and secure solution. It is also suggested to configure Apache with TLS to encrypt the username and password transferring to the web server to further increase security.
This post is part of our Red Hat Certified Engineer (RHCE) exam study guide series. For more RHCE related posts and information check out our full RHCE study guide.
Excellent site for RHCE revision.
Question: In RHCE exam after configuring teaming network, is it also require to set up hostname on server1 and server2(desktop). If so could you explain the steps to set up hostname on a server?
Thanks.
Honestly can’t recall, in any case setting the hostname is a pretty standard procedure. https://support.rackspace.com/how-to/centos-hostname-change/
Thanks very much Jarrod. you have been very helpful.
Question1: Which of these two method would you recommend to set up ipv4 address network using nmcli cmd:
Method1:
# nmcli con mod team0 ipv4.address 10.0.2.87/24 ipv4.dns 10.0.4.254 ipv4.gatway 10.0.0.1 ipv4.method manual
# nmcli con up team0
Method2:
# nmcli con mod team0 ipv4.address ipv4.method manual
connection.autoconect yes
# nmcli con up team0
Question2: After configure ipv4 address, it is recommended to set up hostname on both server1 and server2 in the RHCE exam.
For the first question, I don’t think it matters which way you do it as long as it gets the job done. For the second one, can’t recall about hostnames but I think that’s an RHCSA requirement so as long you know how to do it if you’re asked to do it you’ll be fine.
I tried Require ip but it didn’t work. I can still access to apache default page from my IP (20.139.xxx.xxx)
AuthType Basic
AuthName “Private Content!”
AuthUserFile /etc/httpd/htpaswd
AuthGroupFile /etc/httpd/htgroup
Require group engineer
Require ip 192.18.100.0/22