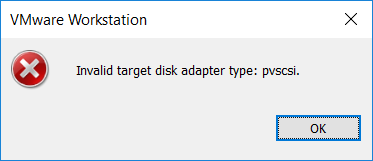
This quick post is aimed to help you fix the “Invalid target disk adapter type: pvscsi.” error that can occur when importing a virtual machine into a VMware virtualization product.
In this example I’m using VMware Workstation Pro 14 on Windows 10, however the fix should apply to other versions such as VMware Player or VMware Fusion as well.
Upon importing the virtual machine, it would error right at the start with the following message:
Invalid target disk adapter type: pvscsi.
Now an OVA file is basically just a zip containing other files needed for the virtual machine.
In this case I used 7-Zip to extract the contents of my OVA file, which contained .mf, .ovf, and .vmdk files.
The .ovf (Open Virtualization Format) file contains XML which describes the packed virtual machine, so it’s just a text file. We’re going to edit this in our favourite text editor.
The following section defines the SCSI controller for the virtual machine, and this is where the problem lies.
      <Item>
        <rasd:Address>0</rasd:Address>
        <rasd:Caption>scsiController0</rasd:Caption>
        <rasd:Description>SCSI Controller</rasd:Description>
        <rasd:ElementName>scsiController0</rasd:ElementName>
        <rasd:InstanceID>5</rasd:InstanceID>
        <rasd:ResourceSubType>VirtualSCSI</rasd:ResourceSubType>
        <rasd:ResourceType>6</rasd:ResourceType>
      </Item>
Simply edit the ‘ResourceSubType’ to lsilogic, as shown below.
      <Item>
        <rasd:Address>0</rasd:Address>
	<rasd:Caption>scsiController0</rasd:Caption>
        <rasd:Description>SCSI Controller</rasd:Description>
        <rasd:ElementName>scsiController0</rasd:ElementName>
        <rasd:InstanceID>5</rasd:InstanceID>
        <rasd:ResourceSubType>lsilogic</rasd:ResourceSubType>
        <rasd:ResourceType>6</rasd:ResourceType>
      </Item>
In this instance, I’ve only modified the ResourceSubType from VirtualSCSI to lsilogic. I don’t recommend changing the rest of the Item tag unless you’re still having problems, in most cases you should only need to edit the ResourceSubType.
This took me a while to work out, as when I initially searched the .ovf file I was searching for instances of ‘pvscsi’, which did not exist.
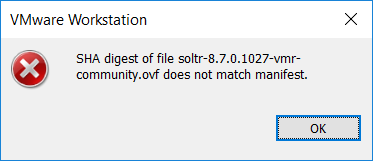
Once the .ovf file has been saved we’re not done yet, we still need to take care of the .mf file, which contains hashes of the .vmdk and .ovf files. As we just modified the .ovf file above, the hash is no longer correct, so you will receive the following error if you try to import the virtual machine at this stage:
SHA digest of file *.ovf does not match manifest.
To fix this you need to install OpenSSL, I’ve installed this in Windows but the syntax should be the same regardless of operating system. Basically you want to run the following command, replacing the names of the .vmdk, .ovf, and .mf file as appropriate.
E:\>openssl sha1.vmdk .ovf > .mf WARNING: can't open config file: /etc/ssl/openssl.cnf E:\>
The warning isn’t really an issue here, that directory doesn’t exist on Windows. Regardless, the hashes of the .mf file are regenerated. You should now be able to simply open the .ovf file with your VMware product and it should start importing correctly.


This saved me a lot of time, thanks!
Thankx a lot!! Did the trick!!
It is possible just to delete the .MF . The import will ignore it not been there and continue
@Bill this helped a lot, thanks!
Thank you ! It saves me !
@Bill : thanks for the MF trick !
Thanks a lot for the tip!
Great Post, thanks for the help with my Fortinet VMs
Thanks! Great!
Just for the case you get an invalid manifest at line1, just open the file in notepad++ and convert it to UTF-8 + save. That should do it!
Thanks for the tip!
Thank you, thank you, thank you!
Ran into this importing Amazon’s AML2 into VMware Workstation. Works like a charm.
Great to hear!
Thanks!
Thanks so much for this. For anyone searching hopefully google picks this up, I used this process to successfully fix Cisco’s FMCv OVF creating a VM in VMWare workstation 14. Until Cisco fixes the VM packages this will be my go to fix for VMWare Workstation.
Thanks for this, helped me get my OVA working in workstation!
No problem, good to hear!
Thanks a lot for this tutorial.
To make it easier, instead of openssl, I installed an exploer context menu extension that calculate file checksums in many formats
thanks it saved me a few hours
Which opens have you used, I am finding trouble with the above command you have specified it’s not executing in my scrnario.
Absolutely Beautiful!!
I am curious why this happens…
I created a RHEL74 Template on a ESXi 6.0 host and had been using it in my Workstation Pro, but not sure if it was 12.x or 14.x.
I just noticed that it was failing sometime after I upgraded to 14.1.x.
Thanks;
Tom M
Thanks, just one thing on the generating SHA1 Step you could use “CRC SHA” it’s comes with 7-Zip, the problem you have to write the code, no copy/past option, Many Thanks
Thanks! it worked as described.
You saved my time…. Yuck ROCK
No problem!
Did the trick for me.
Nice!
si esque no te funciona editar, porque no aparece el archivo xml, puedes reemplazar en el esxi, el paramento de editar la maquina virtual
Controladora SCSI 0 >>> LSI LOgic Parallel, a mi me funciono asi.
tnx a lot, so useful
Instead of using OpenSSL to generate the SHA1, you can also just use PowerShell:
Get-FileHash -A SHA1 Whatever.vmx
no need for open ssl. Just open mf file in wordpad and change first file extension to mf , save it and then import again ovf file .
An alternative is to delete the .mf file instead of editing it.