While Windows Defender can be configured at a high level through the graphical user interface, we can instead configure Windows Defender using group policy which gives us more control and allows us to roll out the settings to the whole domain from a central location.
This post is part of our Microsoft 70-744 Securing Windows Server 2016 exam study guide series. For more related posts and information check out our full 70-744 study guide.
Configure Windows Defender using Group Policy
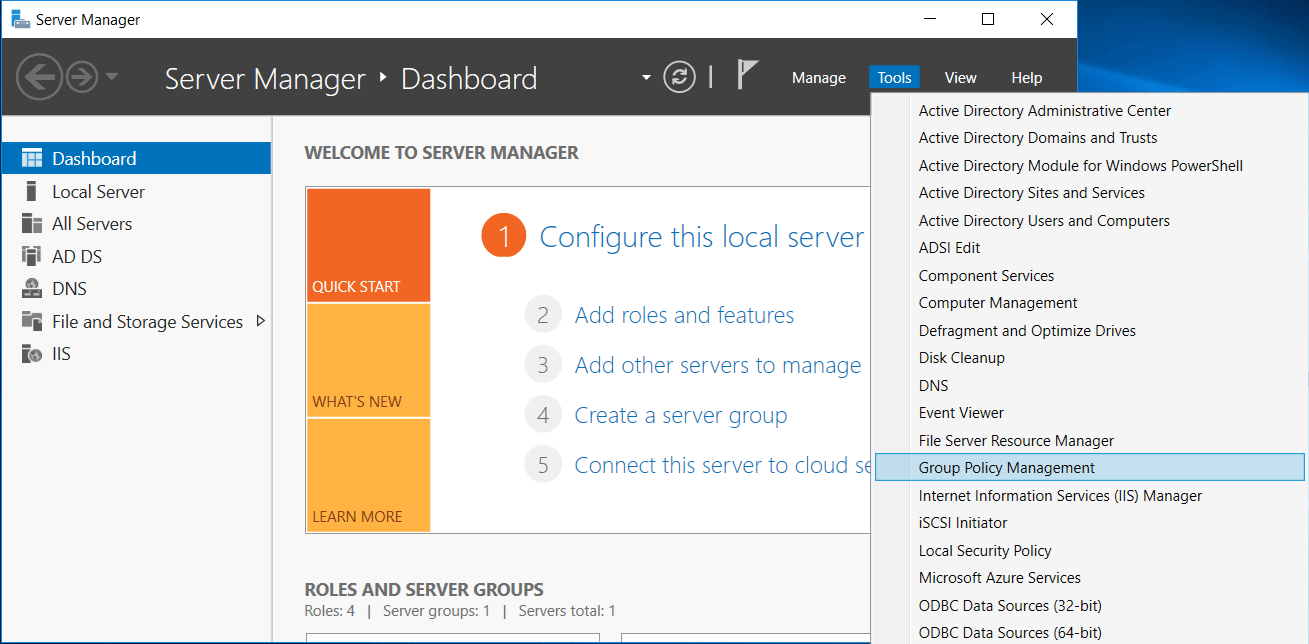
We’ll start by opening Server Manager, selecting Tools, followed by Group Policy Management.
We can also open this by instead running ‘gpmc.msc’ in PowerShell or Command Prompt.
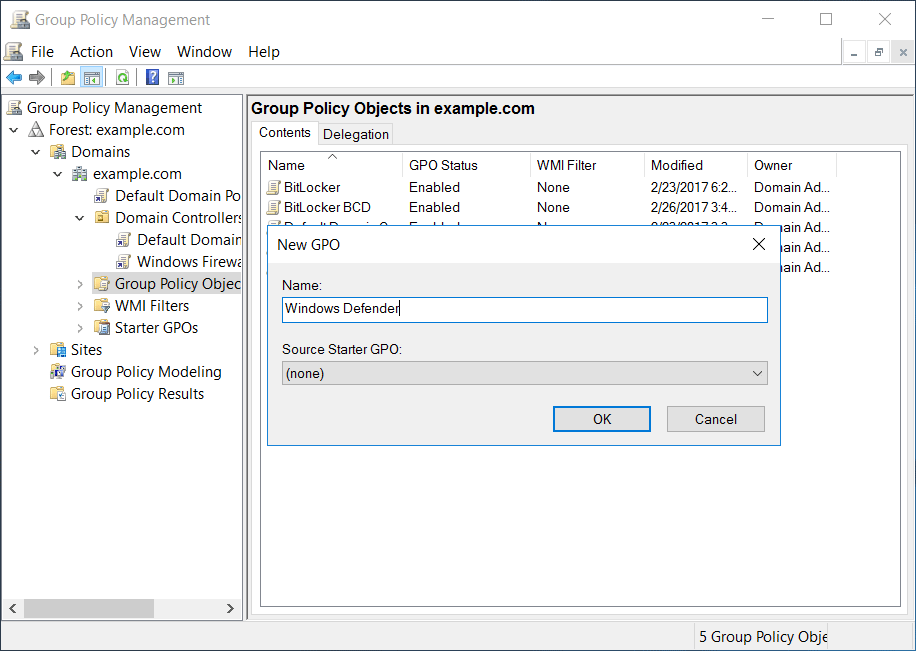
From the Group Policy Management window that opens, we’ll select the group policy objects folder within the domain, right click and select new to create a new group policy object (GPO). In this example we’ll name our GPO “Windows Defender”.
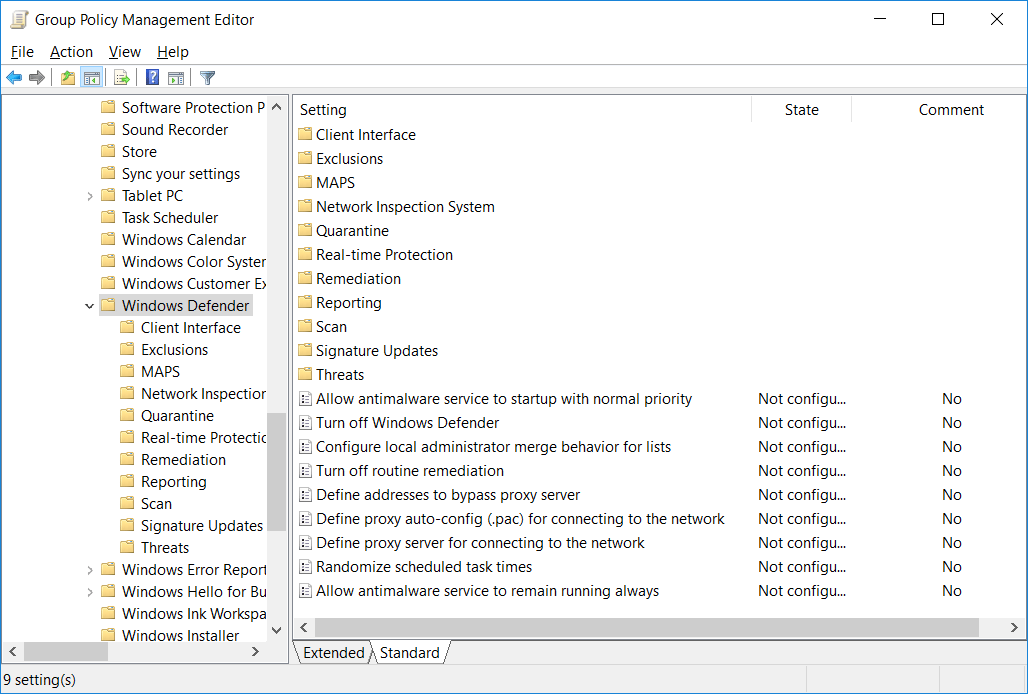
Once the base GPO has been created, right click it and select Edit. This will open the Group Policy Management Editor (GPME). From within GPME, select Computer Configuration > Policies > Administrative Templates > Windows Components > Windows Defender.
As you can see there are a lot of sub folders containing quite a few different policies that can be applied, we’ll cover some of the most useful items here.
- Turn off Windows Defender: We can set this policy to disabled, or leave it as not configured to have Windows Defender on and scanning for malware. As the policy is not configured by default, Windows Defender is enabled.
- Client Interface > Suppress all notifications: By default Windows Defender notifications will display to all clients, this policy can be enabled to stop clients from receiving notifications.
- Client Interface > Enable headless UI mode: If enabled this policy will not display the user interface to users, which may be preferable if Defender is centrally managed and users do not need to view information from it.
- Exclusions: We can define file extension, path, or process exclusions here. This will prevent the specified file, path, or process from being scanned by Windows Defender on all machines where the policy is applicable to.
- Quarantine > Configure removal of items from Quarantine folder: This policy defines the duration in days that a detected item should remain in the quarantine folder prior to being removed. By default items will be stored indefinitely and are not automatically removed.
- Scan > Allow users to pause scan: By default a user can pause a scan, this policy setting can be disabled to prevent users from pausing Defender scans.
- Scan > Specify the maximum percentage of CPU utilization during a scan: By default this is set to 50%, however we can modify it to the specific value we desire.
- Signature Updates > Turn on scan after signature update: By default straight after a definition update Windows Defender will automatically perform a scan, this can instead be disabled if needed by configuring this policy.
- Specify the day of week to run a scheduled scan: This policy allows us to set a custom day of the week to run the scans.
- Specify the time of day to run a scheduled scan: This policy allows us to set a custom time to run the scans.
Most of the policy options are pretty sensible and provide a good level of baseline security. Once you’ve made your policy changes, close the GPME window and link your policy to a site, domain, or organizational unit (OU) to apply it.
Remember that this is not an exhaustive list, I recommend looking through all of the available policy options for Windows Defender so that you can get an understanding of how you can configure Windows Defender using group policy for the 70-744 exam.
Summary
As shown we can configure Windows Defender using group policy, allowing us to customize the way Defender operates within our Windows domain.
This post is part of our Microsoft 70-744 Securing Windows Server 2016 exam study guide series. For more related posts and information check out our full 70-744 study guide.


Windows Defender udner Windows component is not there. I only see Windows Defender Smartscreen