In this post we’re going to take a look at both manual and automatic update approvals in Microsoft’s Windows Server Update Services (WSUS). Updates need to be first approved before they will be made available for download and installation by the client computers.
This post is part of our Microsoft 70-744 Securing Windows Server 2016 exam study guide series. For more related posts and information check out our full 70-744 study guide.
Manual Update Approval
In the WSUS console we can view the available updates through the Updates heading from the menu on the left. Select one of the sub headings and view all updates of that type. You will be able to see if the updates have already been approved or not, as well as a percentage that represents the total amount of your machines that already have that particular update installed already.
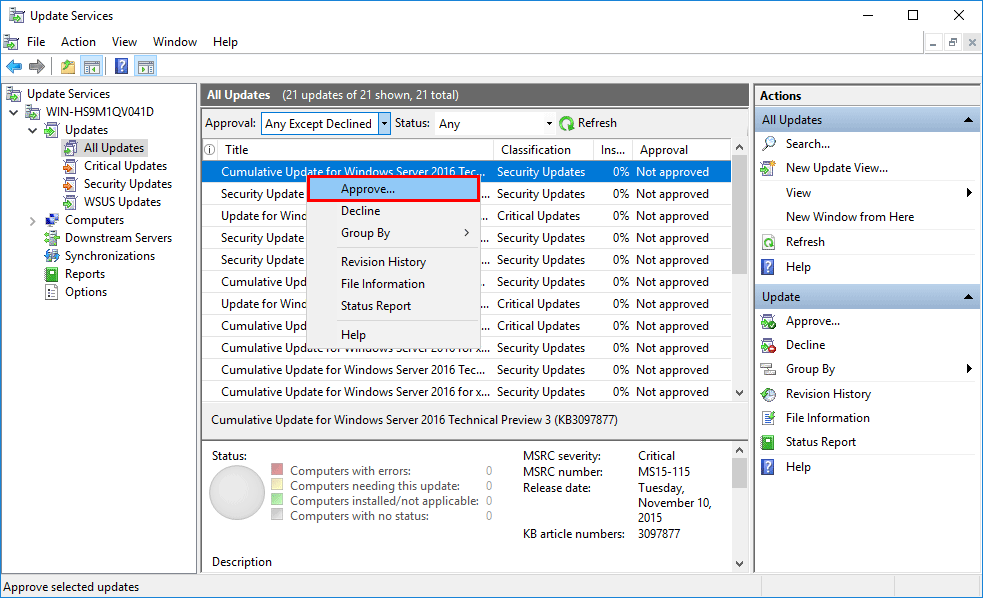
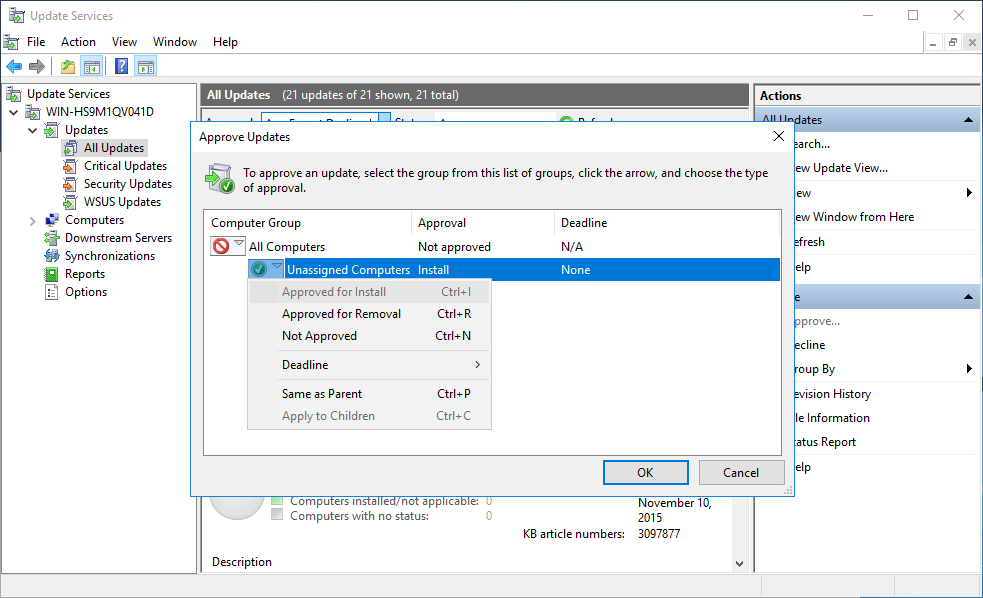
In order to approve an update, simply right click it and select approve update. You will then be able to select the computer groups that you wish to approve the update for.
Automatic Update Approval
Now that you have an understanding of how to manually approve an update through WSUS, we’ll look at automatic approvals as this will save us a lot of time when there are many updates to approve in a larger environment.
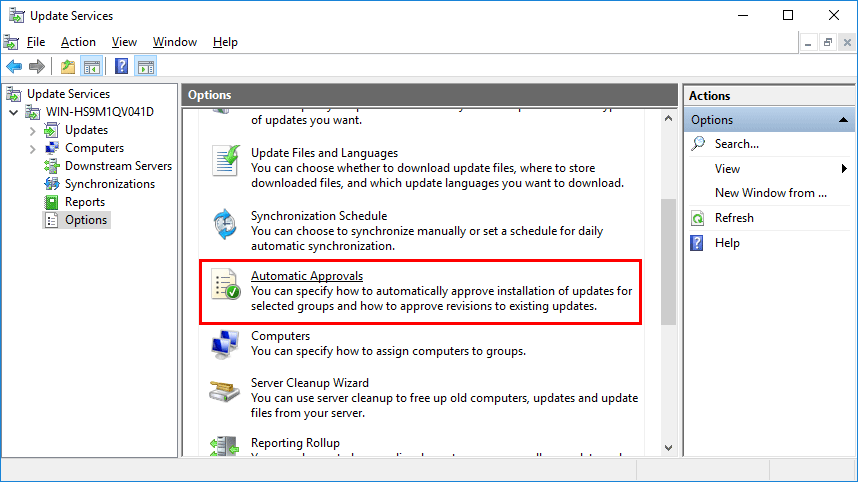
To configure automatic approvals, open the WSUS console, select Options from the menu on the left, and then select Automatic Approvals as shown below.
From the Automatic Approvals window that opens next, you can create a new or edit existing auto update rules. We can see that there is a Default Automatic Approval Rule already in place which will automatically approve an update if it is a critical or security update for all computers. This is not actually enabled by default, however we can enable it simply by ticking the box next to the rule. Optionally we can also click Run Rule to run the rule now, this will force all updates that match the selected criteria to become approved for the computer groups defined in the rule.
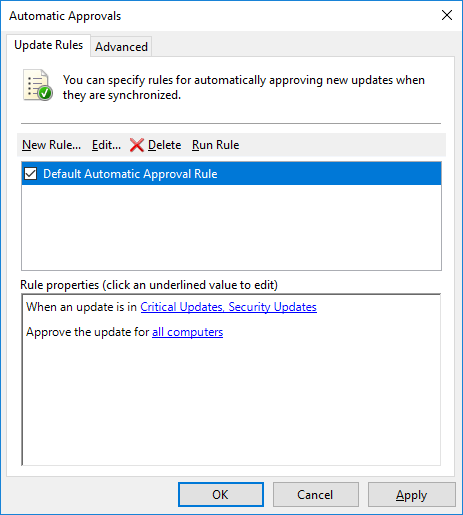
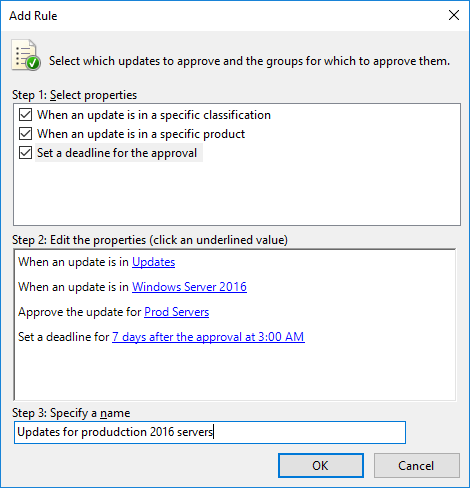
When adding a new rule we can be quite specific on what and when we want to approve the defined set of updates. We can approve updates based on their classification or product type, and specify the group of computers we want to approve these updates for. We can also optionally set a deadline for the approval. The deadline will cause a forced restart at the time of the deadline if the update has not yet been installed.
For example, in the image below we are creating a new rule called “Updates for production 2016 servers” which will automatically approve updates that apply to Windows Server 2016 and are members of the “Prod Servers” computer group. If the updates are not installed for 7 days after the approval takes place, they will be automatically installed at 3am.
Summary
We have shown you how to manually approve Windows updates through WSUS to specific computer groups, as well as create custom approval rules that will automatically apply a defined selection of updates to a set of computers.
This post is part of our Microsoft 70-744 Securing Windows Server 2016 exam study guide series. For more related posts and information check out our full 70-744 study guide.
If you have your servers set Windows Updates to Auto Download the update but manually install and you set a deadline, what will happen if the deadline is reached?
I’m not actually sure, would require testing to see what the behavior is as I can’t see it defined anywhere.
Say I want to set automatic approvals for security and critical updates and I want these computers to be rebooted at Thursday at 5am. Would a deadline approval be required? How do I go about scheduling the reboot?
Deadlines will basically enforce the install / reboot to take place if it hasn’t yet already done so. If you want to ensure that happens that the day and time specified then you should set this.