This post will cover how to increase the disk space for a Windows Server 2016 virtual machine running in VMware, however the steps apply to any virtualization solution.
First we’ll increase the size of the actual virtual disk that is attached to the virtual machine, followed by making the required changes in the operating system in order to take advantage of the additional space from the hard disk expansion.
The server can stay online while the disk space is upgraded with this method which is ideal for most production servers, there’s no need to perform a system reboot.
Increasing The Virtual Disk
The first thing that we need to do is increase the allocated disk space of the virtual disk that is attached to the virtual machine itself. For me this is done by right clicking the virtual machine in vSphere, selecting edit settings, and then selecting the hard disk to expand.
In the image below I have increased the disk space of the hard disk from 20GB to 30GB. Once complete click the OK button to proceed, this is all that needs to be done on the hypervisor side of things.
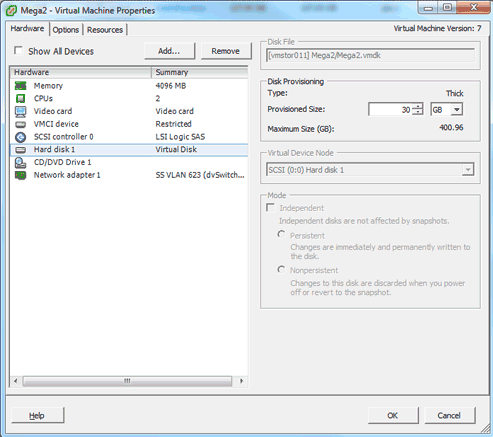
If you are not able to modify the size of the disk, the provisioned size setting is greyed out. This can happen if the virtual machine has a snapshot in place, these will need to be removed prior to making the changes to the disk. Alternatively you may need to shut down the virtual machine if it does not allow you to add or increase disks on the fly, if this is the case make the change then power it back on.
Also note that this is not hypervisor specific, you can just as easily perform the disk increase through Hyper-V, VirtualBox or VMware Workstation/Fusion for example and then continue with the following steps which take place within the Windows operating system. Of course depending on what you’re using you may not be able to complete the entire process without a reboot.
Expand The Volume In Windows
Once the disk space increase at the underlying virtual hardware level is complete as in the previous step, you will be ready to expand the volume through the Windows graphical user interface (GUI) as the file system is not automatically aware of the change. This process is extremely simple and only requires a few mouse clicks in most instances.
This can be done a couple of ways with either Server Manager or the Disk Management tool which is available through the MMC. In this example we’ll use Server Manager.
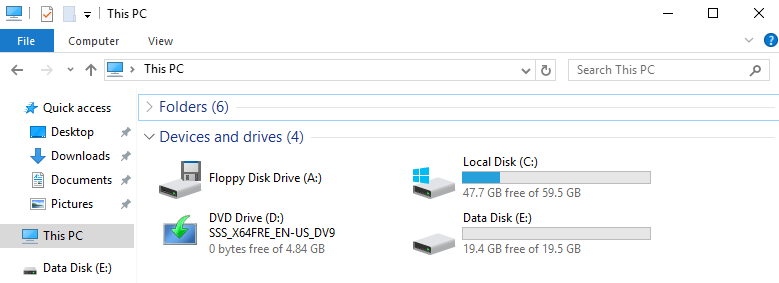
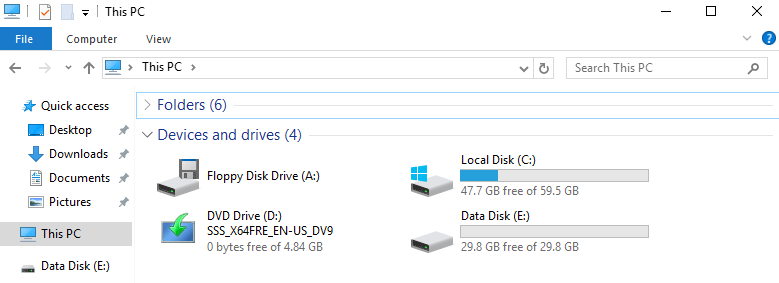
Before we start, here’s a screen shot of This PC showing that our secondary disk E is 20GB in size.
First we’ll open Server Manager, select File and Storage Services from the options on the left, and then Disks which can be found under Volumes. Note that if you had this window open when you increased the virtual disk that you may need to refresh it in order for the disk information to update.
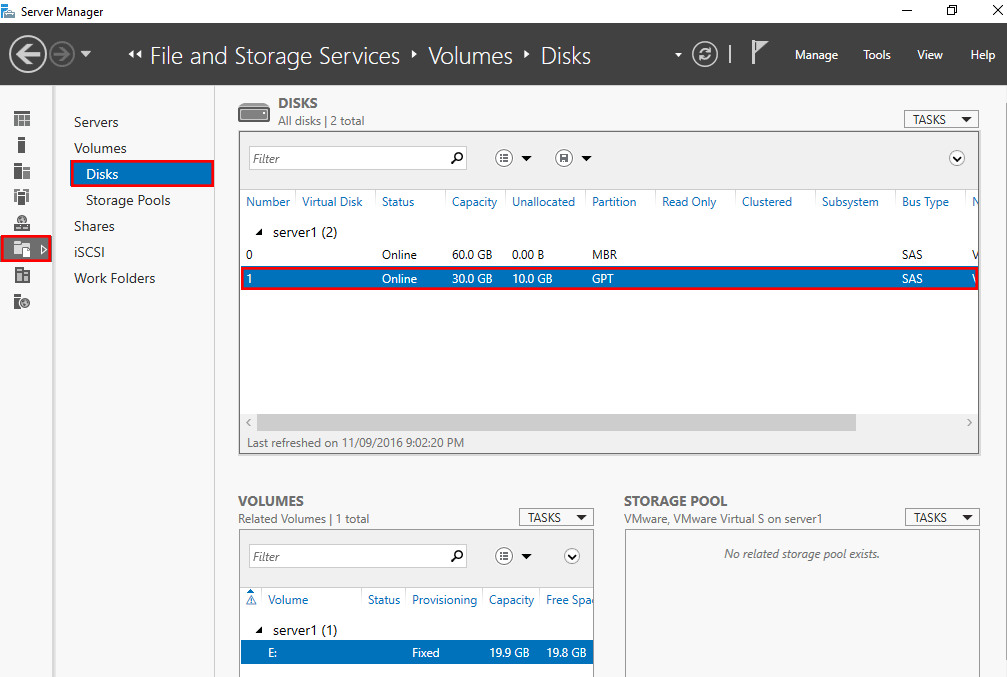
In this example we can see that our secondary disk now shows as 30GB with 10GB being unallocated and available.
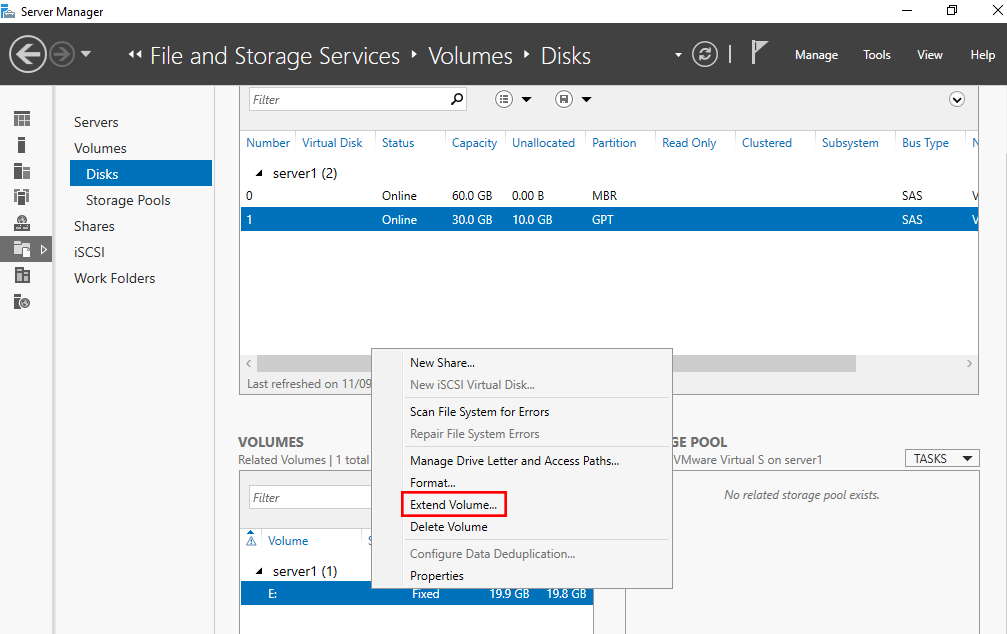
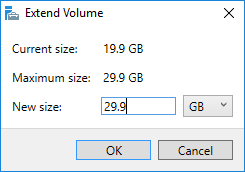
From the volumes section, right click the disk and select “Extend Volume…”
The Extend Volume dialog box will appear, as shown below. Simply enter the size that you want to expand to. In this case we enter 29.9GB, which is the maximum size available to us as noted.
That’s it, the disk has been expanded. The disk in Server Manager now shows a 30GB capacity with 0B of unallocated space, as we have extended the file system with the unallocated space. Our secondary disk E is now ready for use with the extra space, as we can see below it is no longer 20GB.
Summary
This method of increasing disk space in Windows Server 2016 is extremely useful for virtual machines, as there is no down time because the operating system does not need a reboot. Once the virtual disk has been increased, we use Server Manager to extend the volume which is very quick and easy.
Wow, so much easier than Microsoft web site. Thank you!